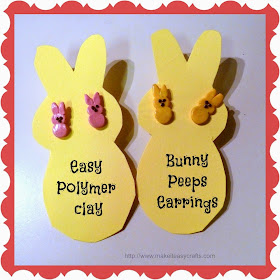
Peeps are everywhere these days and they aren’t just for
Easter anymore either. They are fun in
Easter baskets and at parties. Don’t
just fill those baskets with candy though.
Why not make some Easter peeps earrings.
They are fun for the young and the young at heart. You can make them with scrap polymer clay
leftover from other projects so it is super frugal. Make a set for yourself and one to give as
gifts. After you add the earring posts
cut, out a peep shape from yellow cardboard or construction paper and use for a
unique way to add to an Easter basket!
Supplies:
·
Small amount of polymer clay in yellow, pink, or
lavender
·
Tiny bit of brown polymer clay
·
Clay slicing tool and burnishing tool
·
Sculpey matte finish
·
E6000 glue
·
Small paintbrush
·
Cookie sheet lined with aluminum foil
·
Home oven
·
Ruler
·
Waxed paper to work on
·
Needle nosed pliers
·
Earring findings, Post earring backs
·
Rolling pin (Used for polymer clay only)
Note: It is advisable to make two earrings at the
same time so that you can make sure that each earring is the same size.
1.
Cover your work surface with waxed paper. Condition your clay by kneading with your
hands.
2.
Break off a small piece of clay in your desired
color and roll into a ball (about 5mm size) It will be a little smaller than a
pea. Break off another piece of clay a bit smaller than the first one (about 4mm
size) and roll into a ball. Put them
together. (See photo)
3.
Cut two more pieces. (4mm size) Roll into a ball
and slice in half. You will have four
pieces. Roll each piece putting more
pressure on one end to form a point. Add
two ears to each peep earring. Lightly roll with the clay roller to slightly
flatten. Use the burnishing tool to
smooth out any lines.
4.
Break off just a teeny tiny piece of brown clay
and roll. Use your finger to add two
eyes and a nose. Lightly press in place.
5.
Place the earrings on an aluminum foil lined
cookie sheet and bake in a 275-degree oven for 15 minutes. Do not bake longer or at a higher
temperature. Do not use a microwave
oven. When done remove from oven and let
cool.
6.
When cool use a small paintbrush to brush a coat
of matte finish on the front of each earring and let dry completely.
7.
Use E6000 glue to attach an earring back to each
earring and let dry.


These are ridiculously cute! I'd love it if you'd share your tutorial over at Awesome Life Friday! :) http://rchreviews.blogspot.com
ReplyDelete