Monday, July 25, 2016

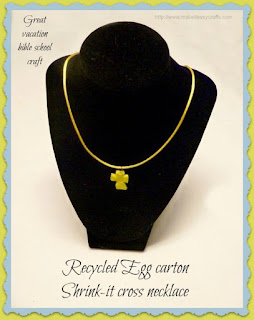
Recycled egg carton shrink-it cross necklace


Recycled egg carton shrink-it cross necklace


Try this quick and easy recycled egg carton shrink-it cross necklace kid’s craft at summer camps, vacation bible schools and more. 

Summer is in full swing and it’s time for summer camp and vacation bible school crafting.  This recycled egg carton cross necklace is easy and costs practically nothing to make so you will be able to make this craft on a budget!

Did you know that you could shrink egg cartons with number (6) recycle symbol in an oven or toaster oven? And the shape shrinks hard and is thick as a nickel?  You can make them in all sorts of shapes and use them for necklaces, zipper pulls, hair ornaments and more!  And the best part is that many egg cartons come in colors so you don’t even have to paint the shapes.  I found white, yellow, and green.  Today I’m making a crucifix in yellow, but you can make it in any color you like.  You can even paint or color the white with permanent markers.

Materials:

·      Number 6 Egg carton in yellow
·      Scissors
·      Oven or toaster oven set to 350 degrees
·      Aluminum foil cover cookie sheet
·      Metal spatula
·      Needle nosed pliers
·      Jump rings
·      Rat tail ribbon
·      Paper hole punch

RECYCLED EGG CARTON CROSS NECKLACE


1.     The first thing you need to do is make sure your egg carton has a 6 symbol somewhere on it.  Number 6 egg cartons are the only ones that will work.

Recycled egg carton shrink-it cross necklace

2.     Next, cut out the egg holder portion.  Each egg holder will make a cross. 

Recycled egg carton shrink-it cross necklace

Recycled egg carton shrink-it cross necklace

Recycled egg carton shrink-it cross necklace

3.     Now cut four equal sections up to the base of the egg holder. 

Recycled egg carton shrink-it cross necklace


4.     Fold down each section flat.  Once you fold all four sections down, trim up each section into a rectangular shape, making one longer than the other three.  You have the cross made.

Recycled egg carton shrink-it cross necklace

Recycled egg carton shrink-it cross necklace

5.     Use the paper hole punch to make a hole in the top of the cross.  This will shrink along with the cross

Recycled egg carton shrink-it cross necklace

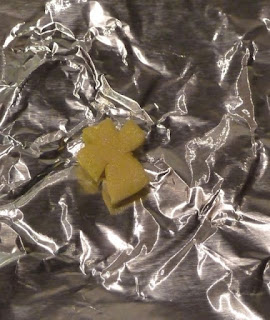
6.     Place the prepared shape on a cookie sheet lined with aluminum foil and place in a 350-degree oven for just a few minutes.  The shape will begin to curl but will soon shrink and lie flat.  When it completely shrunk, remove from the oven and immediately press with the spatula.  You will be able to pick up your cross in just a few seconds and at this point you can trim up any ragged pieces. 

Recycled egg carton shrink-it cross necklace

Recycled egg carton shrink-it cross necklace

Recycled egg carton shrink-it cross necklace
In this photo you can see how it shrinks

Recycled egg carton shrink-it cross necklace
It shrinks thick and hard


7.     Use a needle nosed pliers to open a jump ring by twisting rather than pulling apart and insert through the hole in the top of the cross.  Close the jump ring in the same manner.

Recycled egg carton shrink-it cross necklace

Recycled egg carton shrink-it cross necklace


8.     Cut a length of rat-tail ribbon, thread it through the jump ring and knot the ends together.

Tuesday, July 19, 2016

It's Christmas in July craft tutorial time

Christmas in July


It's Christmas in July craft tutorial time and you can get a jump on Christmas projects way before the traditional holiday rush!

I've gathered a few projects old and new from around the web so you can get started with some cute Christmas craft tutorials.

Bowdabra has some adorable free holiday craft tutorials that you can make right now, put them away, and then when December rolls around you will be all set!

Make some cute seasonal hair bows for your favorite little girl:


Christmas in July


Christmas in July


Make it with recycled wine corks!

Christmas in July


Christmas in July


Crafts for kids


Christmas in July


Christmas in July


So, now you have the beginnings of some quick and easy holiday crafts to start right now!  This Christmas, with a little preparation you will be all ready to enjoy the season.


Monday, July 11, 2016

Recycled light bulb ornament | breast cancer awareness

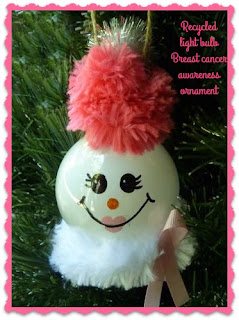
Recycled light bulb ornament for breast cancer awareness


From time to time those large 40-watt light bulbs from my bathroom burn out.  I don’t toss them, however, because this is the perfect size for a light bulb ornament.  This one was destined to be one for Breast cancer awareness.

So this burned out bulb became a cute little breast cancer awareness snow woman.  She looks so cute with her furry pink hat and a breast cancer awareness ribbon adorning her white scarf. 

Since I used a large pipe cleaner for her scarf (available in the craft stores) she can sit on a counter as well as hang on a tree, mantle, or anywhere.  And what’s more, she is so easy to make. 

Come back and visit during the month of July where we celebrate Christmas in July!


Recycled light bulb ornament for breast cancer awareness


Materials:

  • Large round 40-watt light bulb
  • Jute twine
  • Hot glue gun and hot glue sticks
  • Masking tape roll, to hold the bulb while working (optional)
  • Extra large pink and white pipe cleaners
  • Large white/silver pompom
  • Scrap of white felt
  • Pencil
  • Ruler
  • Scissors
  • Paint markers, black, pink, white, and orange (you can substitute glass paint here if desired but the lines are easier with a paint marker.
  • 5/8” wide grosgrain pink ribbon

Instructions:

1.     Place the light bulb in the center of a masking tape roll or other surface that holds it still while you work.  Cut a piece of jute 24” long.  Fold the jute in half to find the center and using the glue gun attach to the top ridged section of the bulb.  Bring the jute to the back and tie in a knot using glue to attach.  Next, bring the sides up adding glue to hold and tie in a knot at the top center.  Add more hot glue to secure.  Finally, make a loop at the top and tie a knot for the hanger.  Cut off any excess jute.

Recycled light bulb ornament for breast cancer awareness

Recycled light bulb ornament for breast cancer awareness

Recycled light bulb ornament for breast cancer awareness


2.     Next, begin to wrap the large pink pipe cleaner around the exposed metal portion of the bulb attaching with hot glue.  Continue till you have attachĂ© the entire pipe cleaner. 

Recycled light bulb ornament for breast cancer awareness

Recycled light bulb ornament for breast cancer awareness


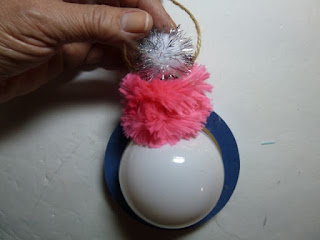
3.     Add a large white/silver pompom in the center top for the hat.

Recycled light bulb ornament for breast cancer awareness

4.     Wrap the large white pipe cleaner into a circle shape and twist to secure.


Recycled light bulb ornament for breast cancer awareness


5.     Add some hot glue all around the pompom circle and add the bulb on top.  (Scarf)  Cut a circle of white felt and glue to the bottom.  Your snow-woman will stand upright.

Recycled light bulb ornament for breast cancer awareness


6.     Paint the face.  Using a pencil draw the two circles for eyes, one circle for the nose and a mouth.  You can rub the pencil marks off if you are not happy with them.  This is just a painting guide. 

Recycled light bulb ornament for breast cancer awareness

7.     Follow the lines to fill in the eyes and draw the eyelashes with the black paint marker. Fill in the nose circle with orange.  Finally, draw the line for the mouth with the paint marker. Let dry. 


Recycled light bulb ornament for breast cancer awareness

8.     Make the lips with the pink paint marker and put a dot in each eye

Recycled light bulb ornament for breast cancer awareness

9.     Cut a piece of pink ribbon fold into a loop and attach with hot glue to the scarf.  Your breast cancer awareness snow woman is ready to display or hang on the tree.

Recycled light bulb ornament for breast cancer awareness

For more information about Breast cancer or to donate to the cause, visit Breastcancer.org 


Sunday, July 3, 2016

Patriotic Horse coloring page


First, I want to wish everyone a happy and healthy July 4th Holiday!  Enjoy the fireworks, picnics and celebrations.  

Second, I am offering a free printable Patriotic Horse coloring page that you can download for free.  Just click the link above and print on your home printer. The kids will love this happy little stars and stripes patriotic horse.


It's fun to have a coloring contest and award a prize for the best one.  Coloring keeps the kiddies busy while the adults are setting the tables or making the potato salad.  

Coloring can even relieve stress so many adults are joining the coloring craze.  Just grab some colored pencils or markers and go to town.  And finally, check out all the other free coloring pages on Make it easy crafts and enjoy your holiday!