Monday, August 29, 2016

Simple to make glow in the dark ghost magnet

ghost magnet


Today we have a fun little ghost magnet tutorial.  The kids will just love how this little ghost wiggles when you tap him.  They will especially love how he glows in the dark! 

We create him using thin foam from an egg carton or meat tray.  This foam is so great since it has 
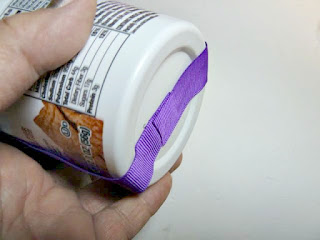
a soft thickness. Cover the prepared ghost shape with glow in the dark duct tape; add the eyes, and magnet to finish.  Keep him on the fridge or any metal surface.

Materials:

Foam from an egg carton or meat tray
Scissors (kid’s craft)
Craft knife (optional for adults only)
Ghost pattern
Wiggle eyes
Glow in the dark duct tape
24-gauge wire
Wire cutters
Pencil
Heavy-duty magnet
Hot glue gun and hot glue sticks

Instructions:

1.     First, download and print the ghost pattern and transfer to the foam.  Cut the shape out with scissors.


ghost magnet


ghost magnet


ghost magnet


ghost magnet

2.     Next, place the pattern on a cutting board or other removable surface.  Cut two small pieces of the duct tape and apply to the arm areas. (This way there will only be seams on the arms)

ghost magnet


3.     After you add the tape on his arms, place a large piece of tape all the way down the body of the ghost.

ghost magnet

4.     Now you can either use a craft knife to cut around the tape, or, if you are making this project with kids, remove him and use the scissors to cut all around the tape.  Fold any excess to the back.

ghost magnet

5.     Next, turn the ghost to the back and cover him with the duct tape as you did on the front.  This time cut the duct tape flush with the edges.

ghost magnet


ghost magnet

Add the spring and magnet


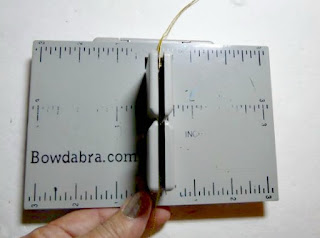
6.     Now to finish,  add the magnet.  For the purpose of wiggling you will have to make a wire spring.  First wind a piece of wire around a pencil to curl about ½”.  Then, remove the wire from the pencil.  Use a hot glue gun to attach the curled wire to the back of the ghost.   Next, use the hot glue to attach the other end of the wire to the heavy-duty magnet.  Let the glue dry.


ghost magnet


ghost magnet


ghost magnet

7.     For the final touch, use the glue gun to attach two wiggle eyes on the front. 

ghost magnet


8.     Attach the ghost to any metal surface and whenever you slightly tap him he will wiggle for a bit.  Turn off the lights and watch him dance in the dark!

ghost magnet

ghost magnet

ghost magnet


Monday, August 22, 2016

How to quickly make a fun, geometric book cover


You can quickly make a fun geometric book cover for all your books.  And what’s even better is this book cover has a post it notepad attached to the front for all those quick little notes and reminders you may have!

If the kiddies aren’t back to school yet, they soon will be and with it comes all the papers to sign and the book cover requirements.  You can buy book covers or you make them and personalize them to fit your individual personality. 

Make this book cover using drawing paper or pastel paper or even recycled brown paper bags. 

So, let’s get started!


Materials:

·      Medium weight paper, I used pastel paper but you can substitute drawing paper or even a large brown paper bag.
·      Cardstock in two prints
·      Tacky craft glue
·      Disappearing marker or pencil
·      Ruler and cutting board or cutting mat
·      Stylus (optional)
·      Scissors
·      Hot glue gun and hot glue sticks
·      Post it note pad, any size, any color
·      Clear tape

Instructions:

1.     First, gather your materials.

2.     Now measure your book to be covered.  Mine was approximately 9 ¼” x 6 ¼”.  The paper I started with was 18” x 24” and since my book’s vertical measurement was 9 ¼” I wanted at least 3” above the top and bottom edges.  So the first thing I did was cut the larger paper 15” x 24”. 

Geometric book cover


3.     Next, I measured from the top to the bottom to find the vertical center of the paper and made a mark.  I centered my book spine down on this center mark and folded the paper around the book making sure I had a good 3 inches over both side edges horizontally.  I made a mark and cut my paper 15” x 21”.  (You measure each book this way, which is why I start with a larger piece of paper.)

Geometric book cover


Geometric book cover

4.     Now, Placing your book in the center, measure evenly from top of the paper and bottom and draw a line across.  Mine was 2 5/8” from the top and the bottom.

5.     Place the paper on a cutting board and following the lines on the top and bottom score with a stylus.  (This is optional but makes a neater fold)  Fold on the lines top and bottom.


Geometric book cover

Geometric book cover


6.     Now place your book in the center and bring the front cover around and stick the cover of the book in the pocket.  Run your fingers along the sides to crease the book cover.  Repeat with the back cover.


Geometric book cover


Geometric book cover


Geometric book cover


Geometric book cover


7.     You may, if you desire, add a piece of tape to the front and back to secure your book cover. 

Decorate the book cover


8.     Cut two pieces of decorative cardstock 6 ½” x 4 ½”.

Geometric book cover

9.     Apply tacky craft glue to the back of the cardstock pieces spreading with a piece of scrap cardboard as a squeegee.

Geometric book cover

10. Add the cardstock to the front one at a time, staggering the placement.

Geometric book cover

11. Use the hot glue gun to attach the post it notepad in a geometric look design.


Geometric book cover


Geometric book cover

Geometric book cover


12. Add name, subject, etc. with markers to further personalize. Pastel paper comes in colors as well so you can have a different color book cover for every subject.

Thursday, August 18, 2016

Make a quick and easy sleepover breakfast party favor

Sleepover breakfast party favor

You will surely be the hit of the party when you make a sleepover breakfast party favor for each of your child’s guests. For one thing, breakfast is on the table in a flash and the best part is the surprise detachable hair bow with each treat.

School will soon be back in session and with it comes sleepovers. After they play till the wee hour who wants to get up and fix a big breakfast? Adults and kid’s especially love cereal. In fact,  you can get a different one for each taste and dietary needs. I used the round tubs but you can easily substitute the little rectangular boxes instead.

Make a sleepover breakfast party favor for each girl in all the same color or change it up to match each one’s fave. Then, after the party each guest will get to take home a lasting memento. And you will have less clean up and more fun.

Lets make a sleepover breakfast party favor


Materials:


            Individual Cold or hot cereals
            Plastic spoon for each sleepover breakfast party favor
            7/8” grosgrain ribbon in desired color
            Hot glue and hot glue sticks
            Mini Bowdabra bow maker with hair bow tool
            Bowdabra bow wire
            Rhinestone, cabochons, button or other bling for the center of bow
            Alligator hair clip

1.    First, gather your supplies. To start, measure how much ribbon you will need to wrap around the cereal container.

Sleepover breakfast party favor


2.    Starting at the bottom, add some hot glue to the center. Attach the end of the ribbon and begin to wrap around adding more hot glue as you go. Continue to wrap up the sides and across the top. Don’t add any glue to the top center since that is where you will insert your spoon.

Sleepover breakfast party favor


Sleepover breakfast party favor


3.    Then, continue gluing and attaching ribbon down the other side till you meet at the other end. Check to see that the spoon will easily fit under the ribbon on the top. Set aside.

Sleepover breakfast party favor


Sleepover breakfast party favor

Make the hair bow for the top of the cereal


4.    Next make the bow. First, cut a piece of Bowdabra bow wire 18” long, fold in half and insert into the Bowdabra. You will have a loop on one side and two loose wires on the other.

Sleepover breakfast party favor

5.    Now, cut a 15” piece of 7/8” wide grosgrain ribbon, then fold in half to find the center and insert into the Bowdabra.

Sleepover breakfast party favor

6.    Then you make a loop with one end, bring it around and insert the end under and into the Bowdabra.

Sleepover breakfast party favor

7.    Now, Bring the other end across the first loop, bring it under and insert the end into the Bowdabra. To clarify, it will look like an X.

Sleepover breakfast party favor


Sleepover breakfast party favor

8.    Now, to finish the bow, push the first loop into the Bowdabra, then push the second (top loop) into the Bowdabra and you will form the bow.

Sleepover breakfast party favor


Sleepover breakfast party favor

9.    Scrunch down with the Bowdabra wand.  Insert the two loose wires through the loop and pull tight while the bow is still in the Bowdabra. Remove the bow, turn to the back and tie a knot. Tie a second knot and then arrange the bow if necessary.  Finally, using the hot glue gun attach an alligator clip to the back of the bow. Cut off any extra wire. You may optionally add a small charm, rhinestone or ornament to the center of the bow with some more hot glue because you can never have too much bling!  Lastly, attach the removable hair bow to the spoon on the top of the sleepover breakfast party favor.

Sleepover breakfast party favor


You can find Bowdabra bow maker at just about every craft store and Walmart!