Showing posts with label DIY. Show all posts

Wednesday, April 12, 2023

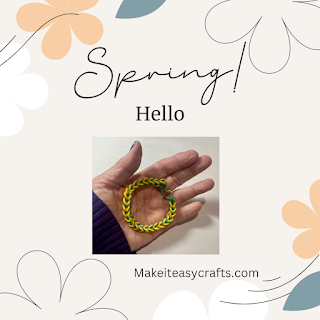
How to use a simple technique to make super fun spring friendship bracelets

In this easy DIY tutorial, you will learn how to easily make some fun spring friendship bracelets in just minutes with just a few supplies.  

spring friendship bracelets


Materials:

Pack of Green and yellow mini rubber bands or desired two colors

Two pencils

3 inches of wrapped floral wire

Wire cutters

Needle nosed pliers

Ruler

Instructions:

First, place two pencils side by side. Next, slide a green rubber band in a figure-eight shape on the pencil. (See photo) Next, slide on a yellow rubber band, and then a green one.  You just need to slide these on without a figure eight. (See photos)


spring friendship bracelets


Now, lift the bottom rubber band and pull it over the top of the pencil. Repeat on the opposite side. (See photo)


spring friendship bracelets

Add a green rubber band and repeat step #2.  Continue adding rubber bands and pulling over the top alternating green and yellow.  You will start to see a chain forming in between the pencils.  As it grows, pull on it slightly to keep it even.

spring friendship bracelets


Keep adding bands to make the chain longer until you have a length to fit adjusting the wrist. Factor in the size of a one-inch wire curl closure.

spring friendship bracelets


Using the wire cutters cut a 3-inch piece of wrapped floral wire. Next, Insert the wire into the loose end of the chain loops.  Curl the wire end around the rubber band loop.

spring friendship bracelets


Remove the other end of the chain from your pencils and insert the uncurled end of the wire in both loose ends. Now, curl it around as you did the other side and adjust if necessary.

spring friendship bracelets

spring friendship bracelets

spring friendship bracelets


Wednesday, December 21, 2022

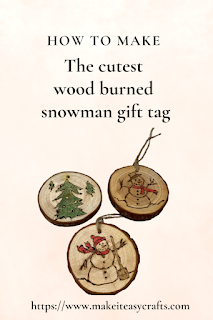
How to easily wood burn the cutest snowman gift tag

 Grab some bark wooden rounds and you can make the most adorable snowman gift tag.  You only need a woodturning tool (available at all craft stores and online) and some watercolor pencils.  Add to your gifts for an extra ornament gift on the gift.


snowman gift tag


How to wood burn the cutest snowman gift tag

Materials:

Woodburning tool

Wooden rounds with bark

Watercolor colored pencils

Fine sandpaper

Pencil

Rubbing alcohol

Small paintbrush


Instructions:

First, sand the fronts of your wooden rounds to smooth out any rough spots. Now, draw the snowman in pencil on the front of the round. Use the examples given, but you can always add some extra additions to your snowman to personalize. Ex: Nurses cap, etc.


snowman gift tag

Begin burning your tag

Next, heat up your woodburning tool.  Be extra careful since these tools get extremely hot. Carefully trace the lines on your snowman with the woodturner.  

snowman gift tag


When you have finished it is time to color in the parts you want to accentuate. Color the scarf, hat, etc. with the watercolor pencil of choice.

snowman gift tag


Now, using the alcohol and the small paintbrush brush the color to blend.  The alcohol makes the color sink into the wood itself.


snowman gift tag


To finish write to and from on the opposite side of the tag and use the woodturning tool to outline it.


Add the string for the tag (They are usually included with the wood rounds)

snowman gift tag


Wednesday, June 23, 2021

Check out five of the easiest patriotic crafts

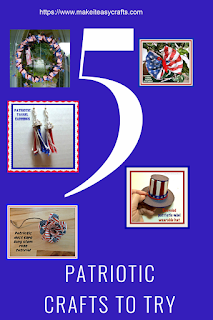
If you are looking for easy patriotic crafts, look no further.  These 5 simple crafts will make the holiday a bit more fun. There is something for everyone, wearables, kid's crafts, and family crafts.  So let's get started!

patriotic crafts


First, make a long stem duct tape patriotic rose. It's so easy and quick to make and looks great on a July 4th table or in a vase for any event.  You can make it easy! 


Long stem duct tape rose DIY


For the next easy craft, get the kids involved.  Crafting as a family is a fun and rewarding activity. These napkin butterflies are a quick and inexpensive craft and will look great in so many ways.  You can attach them to a bamboo stick, hair clip, and more.  The kids will have a blast making these fun butterflies!


And for something a bit more elegant, why not make these patriotic tassel earrings.  Jewelry making is not as hard as you might think.  These earrings will be sure to get a lot of compliments so let’s get going and don’t forget to make a few for gifts too!


Our next craft is a cute wearable mini patriotic hat.  Simply attach it with some hair clips and you can be decked out for the party!


Finally, If you are getting your house decorated for July 4th, then you really need something to greet your guests.  The next project is a patriotic wreath.  Simple and so much fun to put together!


 That's all for today, come back for more fun DIY projects, and remember to make it easy!


Monday, November 2, 2020

How to use a holiday napkin to make amazing seasonal glass décor


 Did you know that ModPodge comes in a dishwasher safe formula?  And did you also know that you can use a holiday napkin to make amazing seasonal glass dĂ©cor?  All sorts of holiday napkins are readily available at craft and party stores throughout the holiday seasons.  I found the most beautiful fall leaves accented with gold that is perfect for Thanksgiving.  


You can also use Christmas, New Year’s, Patriotic, Easter, and more napkins when they are available.  And if you use ModPodge dishwasher safe you can put your glassware on the top shelf of the dishwasher or hand wash as needed.  


Note: please be advised that Plaid Enterprises, Inc. has compensated Make it easy crafts by furnishing Plaid product at no charge in connection with this post.


Seasonal decor


Materials:


Glassware, plates, wine or beverage glasses, canning jars, etc.

Napkins in desired prints

Gold leaf pen

alcohol

ModPodge dishwasher safe formula

Small paintbrush


Instructions:


First, choose your napkin.  Then, separate the layers of the napkin so that you are only using the printed piece. 


Seasonal decor

Seasonal decor


Next, choose your clear glass item.  For plates and dishes make sure the right side of the napkin is showing through the glass, so you will have to apply the ModPodge to the wrong side of the napkin.  If using beverage or wine glasses, apply the napkin right side up on the outside of the glass, but about an inch or so from the rim so that your lips will only touch the glass when using.


Seasonal decor


Now, measure and cut the right size for the area you are covering with the napkin.  Then, using the small paintbrush, liberally apply some ModPodge to the surface.  Immediately place the prepared napkin piece.


Next, brush a coat of ModPodge on the napkin.  Wrinkles are fine and give the piece added texture. Let it dry for a couple hours and then apply two more coats of the ModPodge as necessary.  Let dry completely.  It will be dishwasher safe or you can hand wash after it cures for about 28 days.


Seasonal decor

Seasonal decor


Tuesday, July 28, 2020

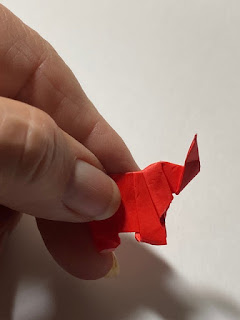
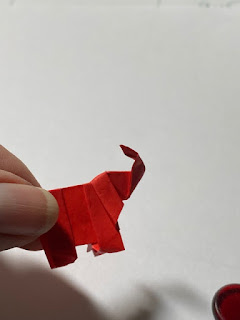
How to make adorable little origami red elephants for earrings

origami red elephants


Elephants are considered good luck in many countries, especially with the trunk raised.  Just, grab some origami paper and you can fold these origami red elephants and make the cutest pair of earrings.  Or you could just stand them up as a mini decoration.  Use the photos as a guide and you will find although tiny, they are not that hard to fold.

Adorable mini origami red elephants


Materials:


Origami paper, red
Nail file

Optional for earrings: 

Needle and head pin 
Needle nosed pliers 
Fishhook ear wires
Wire cutters

Instructions:


First, cut a piece of red origami paper 1 ½” x 3 ½” for each origami elephant.

origami red elephants


Next, fold the paper in half lengthwise.  Turn, and fold the two top edges to a point (like you are making a paper airplane) Fold a second time to make a longer point. 


Turn and fold so that the folded point touches the other side.  Turn over so that the point is on the underside.  Now, fold the folded edge over so it meets the crease, but as you make this fold flip the point back to the front.


Then, fold the left edge under so it meets the center crease. Then fold the bottom folded edge of the point to the edge of the paper.  Then fold the point over to the left, and fold back again to make a kind of fanfold. (Front of the elephant) For the back, fold the flat folded edge over so it meets the center crease and then flip the edge back to the front.  (See photo)


Turn over the paper.  This is the only tricky part so use the photos as a guide.  You will see a kind of rectangle shape.  Just fold the top layer fold the corners inward.  Turn and do the same to the opposite side. Now, it is easier to take this in your hand to do this part, push the folded corners down and press open.  Do the same thing to the opposite side and then flatten them all down.  Use your fingernail or a nail file to make the creases. 


Fold in half. Fold the back legs in so they match the front.  To make the ears, squeeze and fold at an angle making the creases for the ears on each side of the head. The trunk will point down. 

origami red elephants

origami red elephants

origami red elephants


Finally fold the trunk, up, and then back to make the trunk raise.  The red origami elephant is finished.

origami red elephants

origami red elephants


To make these into earrings, using a pint push through the underside to make a hole and insert a headpin.  Cut the headpin down if necessary. Then, use the needle-nosed pliers to twist into a loop adding the fishhook ear wires. Close loops.