Showing posts with label turkey. Show all posts

Sunday, October 29, 2017

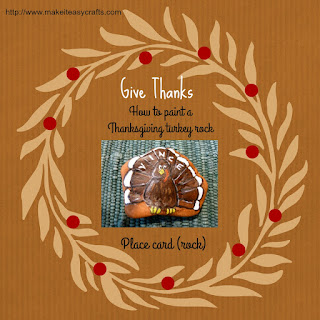
How to easily paint a cute turkey rock table setting

Thanksgiving turkey rock


Painting rocks are all the rage these days.  Whether you leave them for someone to find or you gift them for paperweights, they are inexpensive and fun.  This turkey rock is cute and you personalize it with the name of your guest.  Leave the turkey rock at each table setting and your guest can take it home as a customized party favor and memento.

Add the date and year on the back and the turkey rock will be a lasting memento of the holiday.  You can even have the back blank and let each guest write something they are thankful for before the meal.  It’s a fun tradition for Thanksgiving.

Let's get started:

Materials:

Rock
Acrylic paint in white, brown, lt. brown, yellow, red, orange, and black
Sharpie or any permanent marker in black
Small paintbrush
Newspaper to protect your work surface
pencil

Instructions:


1.      First, paint the entire rock front and back with orange paint.  Let each side dry before painting the other and then let completely dry.  It may help to use a hair dryer to dry all the layers quickly.

Thanksgiving turkey rock


2.      Now, use a pencil to lightly add guidelines for all the shapes. The head is a teardrop oval.  The body is a larger oval.  The beak is a small diamond shape. The feet are three claws on each side of the body. The eyes are two round circles on each side of the beak.  The waddle is a long fat comma shape.  And the feathers are spoke-like fan shapes with a curved top.  You will just fill in the spaces as you would a coloring book!  Super easy.  If you don’t like your pencil lines, erase them and start over.

Thanksgiving turkey rock


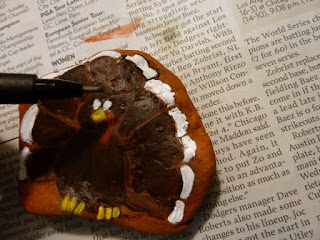
3.     Use the paintbrush and brown paint to block in the head. Next, with the same brown, add a rounded shape. This is the body, which is approximately twice the size of the head.  Let dry.  (See photo)  You are blocking in the basic shapes working around the eyes, beak, and waddle. You will be going over all the lines on entire turkey with the marker when it is finished and dry.

Thanksgiving turkey rock


4.     Now add the tail feathers.  Using the brown paint, start at the bottom and work all around the body making each feather like a fan shape, slightly curved at the top. Now use the white paint on the top of the feathers curving the top. Let dry.  Add the features.  Paint the eyes in white, the beak yellow, and feet yellow, and the waddle red.  Let dry.


Thanksgiving turkey rock

Thanksgiving turkey rock


5.     When all the painted areas are dry, Use the Sharpie or permanent fine line marker to outline all the feathers, body, and features.

Thanksgiving turkey rock

Thanksgiving turkey rock

Thanksgiving turkey rock

6.     Highlight your turkey by making some light brown lines on the body. Add the pupils of the eyes with the marker.  You may also want to use a little thinned white paint to add some highlights on the feathers and body. (See photo)

Thanksgiving turkey rock

Thanksgiving turkey rock

Thanksgiving turkey rock


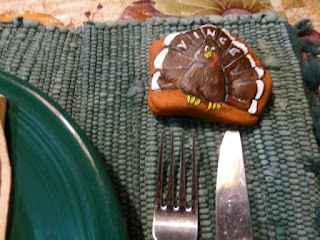
7.     Finally use some white paint to add the name on the feathers, counting the letters so that they are in the center.

Thanksgiving turkey rock


8.     Add the date and year on the back of the rock, or leave blank and let each guest write what they are thankful for.  Place at each place setting.  Your guests can take their turkey rock home as a party favor.

Thanksgiving turkey rock

Thanksgiving turkey rock

Thanksgiving turkey rock


Sunday, October 9, 2016

How to easily make an adorable turkey hair bow

Turkey hair bow


Wouldn’t this adorable turkey hair bow look so cute on your favorite little girl?  Actually it will look just as adorable on adults as well as kids.  Autumn is in full swing and we are all getting ready for the upcoming holidays.  And this Thanksgiving you will be the hit of the day when you wear your turkey hair bow!  This hair turkey hair bow makes a great gift and is a great moneymaker at those autumn craft shows. Check out Bowdabra blog for more free craft tutorials.  You can easily purchase any Bowdabra supplies at your local craft store, Walmart and online.

Materials:

·      Mini Bowdabra bow maker
·      Hair bow tool and ruler
·      Bowdabra bow wire
·      22 inches 1 ½” wide orange grosgrain ribbon
·      Several colors 3/8” wide grosgrain ribbon (red, yellow, rust)
·      Small dowel pieces
·      Wooden clothespins (optional)
·      Lighter
·      Scissors
·      Ruler
·      Alligator clip, covered with ribbon
·      Hot glue gun and hot glue sticks
·      Felt turkey shape (available in craft stores

Instructions:

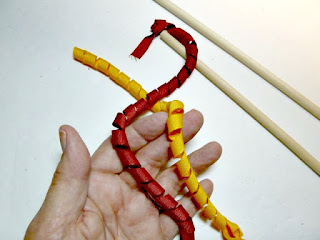
1.     Make the korker ribbon. Wind the 3/8” grosgrain ribbon around a dowel and hold at the ends with wooden clothespins. (You can alternately tie the ribbon at the ends) Place on a cookie sheet lined with foil. Heat in the oven at 275 degrees for 20 minutes. Let cool for 10 minutes before removing.


Turkey hair bow

Turkey hair bow

Turkey hair bow


2.     First place the ruler on the mini Bowdabra.  Next, cut a piece of Bowdabra bow wire 18” long, fold in half and then insert into the Bowdabra.  You will have a loop on one side and two loose wires on the other side.


Turkey hair bow


 Make the bow


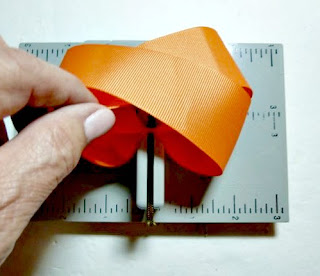
3.     Now, cut a piece of 1 ½” wide grosgrain ribbon 22” inches long and use a lighter to run lightly across the ends to stop it from fraying. (You can alternately use nail polish or a commercial fray stop glue)  Now, fold the ribbon in half to find the center and insert into the Bowdabra.

Turkey hair bow

Turkey hair bow

Turkey hair bow

4.     First, bring the right end over the Bowdabra and under the ribbon and insert the end into the Bowdabra.
Turkey hair bow


5.     Next, take the opposite end and bring it over the first ribbon, then under and insert the end into the Bowdabra.  It will look like an X.

Turkey hair bow

Turkey hair bow


6.     Now press the first loop down into the Bowdabra and follow with the second loop.  When you do this you have made your boutique style bow.  Next you will add the korker ribbon pieces.


Turkey hair bow

Turkey hair bow


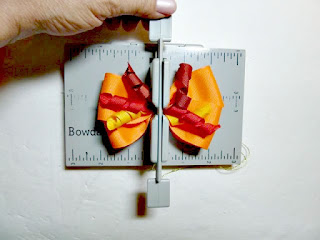
7.     For the korker pieces, cut them to about 4” long and insert each korker piece into the Bowdabra one at a time. 


Turkey hair bow

Turkey hair bow


Finishing your bow

8.     Scrunch down with the Bowdabra wand.  To finish, insert the two loose wires through the loop and pull tight while the bow is still in the Bowdabra.  Finally, remove the bow, separate the wires, turn to the back and tie a knot.  Repeat with a second knot.

Turkey hair bow

Turkey hair bow

9.     For the purpose of making the turkey hair bow, you need to remove the body from the turkey felt piece, since the feathers are represented by the korker and bow.


Turkey hair bow


10. Now turn the bow to the front and use the hot glue gun to attach the turkey.  Make sure before you glue that the korker pieces are all evenly spaced.


Turkey hair bow


Add the clip 


11. Attach an alligator clip to the back with some more hot glue.  In order to make sure the clip stays in place use the excess wire to tie in the center as well.  Clip all the wires short. 


Turkey hair bow

Turkey hair bow

Turkey hair bow

The Bowdabra bow maker makes it easy to make the bow and you can find all the supplies at your local craft store, Walmart or online.