Tuesday, April 7, 2020

How to paint a red ribbon of hope on a rock

red ribbon of hope


So, since this COVID 19 virus is ravaging the world a movement has grown called the red ribbon of hope.  The premise is that you tie a red ribbon on a tree (the tree goes through stages and then come back) to show solidarity.  Many people have started to get in on this and are tying red ribbons around trees.

But what if you don’t have a tree?  Well, then, why not paint a tree with a red ribbon on a rock!  You may already have the supplies since all your need is some paint, brushes and a rock! It’s easy and if you follow the simple steps you can join in the movement with your oven red ribbon of hope.

Get the kids involved.  This is a great family activity with kids. 

How to paint a red ribbon of hope on a rock 


Materials:


Rock
Acrylic paint in brown, black, beige, green, and red
Flat paintbrush
Liner paintbrush
Pencil

Instructions:


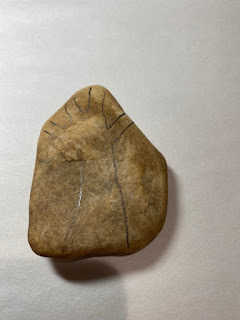
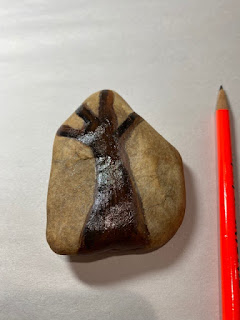
First, draw a tree shape onto the rock surface.  Then, using the flat brush and brown acrylic paint.  While the paint is still wet blend in some black paint on the sides of the tree branches to shade.


red ribbon of hope rock

red ribbon of hope rock

red ribbon of hope rock

red ribbon of hope rock


Next, Dab on some green at the top areas of your tree.  Now using the thin liner brush add some small branches up into the green parts of the tree.  Dab some beige paint on the leaves and branches to show added dimension.  Now, let the tree dry completely.


red ribbon of hope rock

red ribbon of hope rock

red ribbon of hope rock


After the tree is dry, use red paint to paint a red bow.  Line with black pain, then highlight with the beige paint.  

red ribbon of hope rock

red ribbon of hope rock

red ribbon of hope rock


Enjoy your red ribbon of hope and remember we are all in this together!  Stay safe.

Friday, April 3, 2020

Five super simple upcycled crafts to turn trash into treasure

5 simple upcycled crafts


Since the coronavirus has a lot of people self-quarantined many are looking for things to do.  If you didn’t have time to go to the craft store to stock up on supplies, don’t worry.  You can create upcycled crafts with just ordinary stuff you find around the house and turn trash into treasure.

Just be creative.  If something calls for felt, substitute construction paper.  It’s all relative.  There are so many options.  

Most of these projects are great to make with bored kids.  Great for family time while we are all staying inside and safe. 


1.     Recycle advertising magnets into magnetic pets.  You can really have fun with these magnets.  Try using photos of friends and relatives in addition to pets.  If you don’t have double-stick tape, substitute some school or tacky glue spread thinly.

5 simple upcycled crafts


2.      Paint chip photo frame.  You might have some paint chip samples leftover from a painting project.  If you do, the color chips are super cut up and applied onto a frame. You can use a paper shredder to cut the strips or just cut them with scissors to vary the sizes.  Don’t have a frame, use some corrugated cardboard cut in a frame shape and apply the strips to that.

5 simple upcycled crafts


3.     Plastic bag friendship bracelets.  If you get the newspaper delivered many times during rain they come enclosed in plastic bags.  Don’t toss those bags, use them to make cool friendship bracelets.  This one uses a rattail ribbon, but you can easily substitute extra shoelaces, ribbon, strips of fabric.  Be creative.  It’s fun and easy and kids love them!

5 simple upcycled crafts


5 simple upcycled crafts


4.     Shrink an egg carton to make charms.  Remember shrinky dinks?  Well, did you know that any plastic container that has a #6 on it you can shrink to 1/3 of its size and the thickness of about a nickel.  A lot of egg cartons are listed number 6 so if you have one of these follow the tutorial and create all sorts of charms you can use for key chains, backpack charms, hair clips and more.  Remember only number 6 will work. 

5 simple upcycled crafts


5.     Cut up an old DVD and make a shiny mosaic Easter egg.  You can use paper mache eggs, plastic eggs, even Styrofoam eggs.  The trick is for this craft is that DVD’s have two layers, when you separate the layers they super easy to cut into pieces.  The pieces can then be glued onto an egg or other surface.