Wednesday, October 4, 2023

Celebrate autumn - How to make easily make a colorful fall pumpkin topiary

pumpkin topiary


Learn how to make this colorful fall pumpkin topiary with this quick and easy DIY.  


Pumpkins are everywhere right now.  If you want to pumpkin spice up your décor follow this easy tutorial to create this super easy pumpkin topiary.  Check out the dollar stores for stacking pumpkins, grab some supplies, and let’s get started!
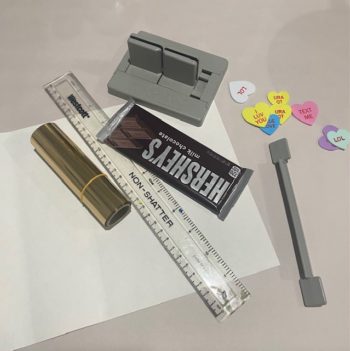
 

Materials:


Spray primer


Stackable pumpkins


Acrylic paints in a choice of colors


Small Paintbrush


Misc. fall florals and berries


3 yards of 1 ½’ wide green ribbon (I used double side greens)


Green Ribbon bow


Glue gun and glue sticks


Instructions:


First, spray all your pumpkins with a coat of primer and let dry.  (You should do this outside or in a well-ventilated area)


Next, decide what colors you would like your pumpkins.  You can paint them solid or paint a pattern.  Anything goes.  I decided to paint one orange, one cream, and the top one brownish red. Apply one coat and let dry, then apply the second coat and let dry completely.


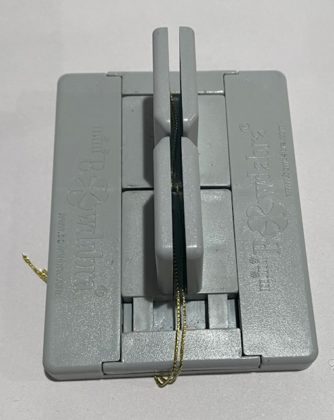
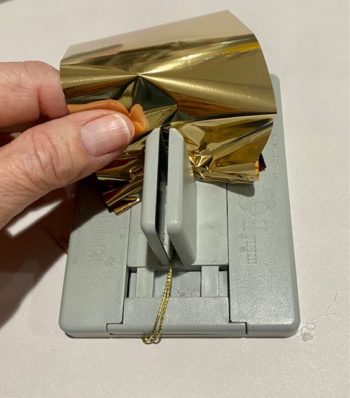
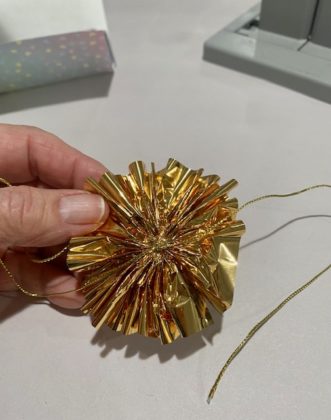
Make a bow for the top of the pumpkin.  To make a super easy and beautiful bow try using the Bowdabra bow maker.  It’s like having an extra hand.


While your pumpkins are drying, you can make your bow.  


Finally, snap the pumpkins together. I like to secure it even better by adding a bit of hot glue. Now, using the hot glue attach foliage, florals, leaves, and berries all around the bottom edge of the biggest pumpkin.  Continue adding florals all around where the second pumpkin attaches to the first one.  


Tie the green bow to the stem of the top pumpkin and add some leaves in between the bow. You have a gorgeous pumpkin topiary to display indoors or on a front porch in an urn.


Note:  You can go one step further by wrapping around some twinkly lights and hiding the battery pack under the largest pumpkin


Wednesday, April 12, 2023

How to use a simple technique to make super fun spring friendship bracelets

In this easy DIY tutorial, you will learn how to easily make some fun spring friendship bracelets in just minutes with just a few supplies.  

spring friendship bracelets


Materials:

Pack of Green and yellow mini rubber bands or desired two colors

Two pencils

3 inches of wrapped floral wire

Wire cutters

Needle nosed pliers

Ruler

Instructions:

First, place two pencils side by side. Next, slide a green rubber band in a figure-eight shape on the pencil. (See photo) Next, slide on a yellow rubber band, and then a green one.  You just need to slide these on without a figure eight. (See photos)


spring friendship bracelets


Now, lift the bottom rubber band and pull it over the top of the pencil. Repeat on the opposite side. (See photo)


spring friendship bracelets

Add a green rubber band and repeat step #2.  Continue adding rubber bands and pulling over the top alternating green and yellow.  You will start to see a chain forming in between the pencils.  As it grows, pull on it slightly to keep it even.

spring friendship bracelets


Keep adding bands to make the chain longer until you have a length to fit adjusting the wrist. Factor in the size of a one-inch wire curl closure.

spring friendship bracelets


Using the wire cutters cut a 3-inch piece of wrapped floral wire. Next, Insert the wire into the loose end of the chain loops.  Curl the wire end around the rubber band loop.

spring friendship bracelets


Remove the other end of the chain from your pencils and insert the uncurled end of the wire in both loose ends. Now, curl it around as you did the other side and adjust if necessary.

spring friendship bracelets

spring friendship bracelets

spring friendship bracelets


Wednesday, January 11, 2023

How to dress up a fun candy bar for Valentine's Day

Looking for a way to present a treat for Valentine’s Day, that is easy and allows you to make a bunch of them in minutes?  Well, dress up this fun candy bar for Valentine’s Day.  It’s a great idea for a party favor or a classroom.  Easy step-by-step tutorial. I've used the Bowdabra to create the bow for this craft. You can optionally substitute a premade bow if desired.

Materials:

  • Flat candy bars, square or rectangular
  • Heart scrapbook paper
  • Tacky glue
  • Scrunchy ribbon
  • Mini Bowdabra
  • Bowdabra bow wire
  • Heart-shaped foam stickers
  • Ruler, pencil, scissors

Instructions:

fun candy bar

First, measure your candy bar and cut the scrapbook paper to fit around with the ends open. Glue on the bottom first, then wrap around the two sides and glue.  Your candy bar is wrapped. Set aside.


fun candy bar

First, measure your candy bar and cut the scrapbook paper to fit around with the ends open. Glue on the bottom first, then wrap around the two sides and glue.  Your candy bar is wrapped. Set aside.

fun candy bar

Next, cut a piece of Bowdabra bow wire.  Then, fold it in half and insert it into the Bowdabra.  You will have a loop on one side and two loose wires on the other side.  This will serve as your slipknot. Tuck the ends under to stay out of the way.

Cut about 12” of scrunchy ribbon and cut in half lengthwise.  Begin feeding the scrunchy ribbon from the top down, like an accordion. Scrunch down with the Bowdabra wand.

fun candy bar

Thread the two loose wires through the loop and pull tight while the bow is still in the Bowdabra.  Remove and separate the ends, turn to the back and tie a knot. Clip the excess wire.

fun candy bar

Now, glue the scrunchy bow on the front of your wrapped candy bar.  Attach a foam conversation heart to the center and a couple of smaller ones on the front.

fun candy bar

Now, go ahead and make a bunch because one fun candy bar is never enough!

fun candy bar