Tuesday, December 15, 2020

Five cool ornaments to make this year 


2020 has been a crazy year. With all the restrictions and stay-at-home orders, what’s a girl to do but craft and stream?  So, I’ve compiled this shortlist of quick and easy cool ornaments you may want to make. These DIY tutorials are courtesy of the Bowdabra blog.


You have to laugh at the craziness of people hoarding toilet paper, especially since toilet paper wasn’t invented in the west until 1857 and people survived. The optional methods sans TP may be the reason many decided to hoard. 


While I am on the subject of toilet paper, I would like to pose a question.  Which way do you hang your toilet paper over or under?  Personally, I wouldn’t start a fight about it, but in my house, my husband likes it under, and I prefer it over. So, whoever replaces the roll in my house gets their way. 70% prefer over.  Not that I am always right but... 


5 cool ornaments:


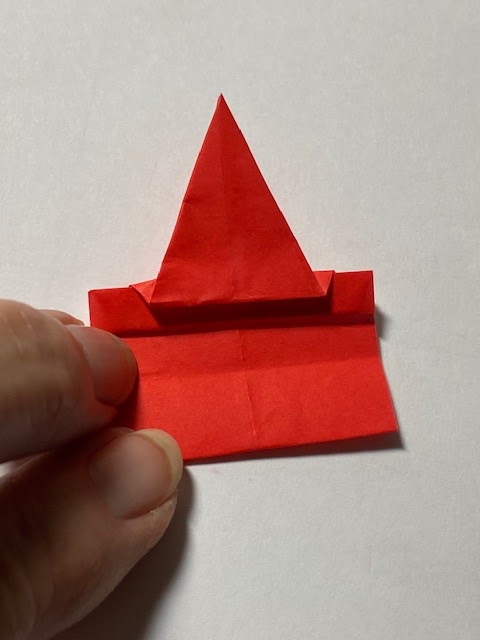
2020 toilet paper ornament


Pom Pom elf ornament


Ribbon candy ornament


Cork pine cone ornament


Christmas bell ornament


Well, have fun creating and be sure and leave a comment!  Merry Christmas and Happy Holidays.  Please follow us on Facebook 


Monday, November 2, 2020

How to use a holiday napkin to make amazing seasonal glass décor


 Did you know that ModPodge comes in a dishwasher safe formula?  And did you also know that you can use a holiday napkin to make amazing seasonal glass décor?  All sorts of holiday napkins are readily available at craft and party stores throughout the holiday seasons.  I found the most beautiful fall leaves accented with gold that is perfect for Thanksgiving.  


You can also use Christmas, New Year’s, Patriotic, Easter, and more napkins when they are available.  And if you use ModPodge dishwasher safe you can put your glassware on the top shelf of the dishwasher or hand wash as needed.  


Note: please be advised that Plaid Enterprises, Inc. has compensated Make it easy crafts by furnishing Plaid product at no charge in connection with this post.


Seasonal decor


Materials:


Glassware, plates, wine or beverage glasses, canning jars, etc.

Napkins in desired prints

Gold leaf pen

alcohol

ModPodge dishwasher safe formula

Small paintbrush


Instructions:


First, choose your napkin.  Then, separate the layers of the napkin so that you are only using the printed piece. 


Seasonal decor

Seasonal decor


Next, choose your clear glass item.  For plates and dishes make sure the right side of the napkin is showing through the glass, so you will have to apply the ModPodge to the wrong side of the napkin.  If using beverage or wine glasses, apply the napkin right side up on the outside of the glass, but about an inch or so from the rim so that your lips will only touch the glass when using.


Seasonal decor


Now, measure and cut the right size for the area you are covering with the napkin.  Then, using the small paintbrush, liberally apply some ModPodge to the surface.  Immediately place the prepared napkin piece.


Next, brush a coat of ModPodge on the napkin.  Wrinkles are fine and give the piece added texture. Let it dry for a couple hours and then apply two more coats of the ModPodge as necessary.  Let dry completely.  It will be dishwasher safe or you can hand wash after it cures for about 28 days.


Seasonal decor

Seasonal decor


Friday, August 21, 2020

How to upcycle a subscription box with decoupage


upcycle a subscription box


How to upcycle a subscription box with decoupage


Many people are enjoying internet subscription boxes whether it is for makeup, supplies, just about anything.  A lot of these subscriptions arrive in sturdy two-piece boxes that would be a shame to toss.  What can you do with them?  Well, they make wonderful gift boxes and decorative storage for small items in your home.  


Using a printed paper napkin of your choice and some ModPodge decoupage medium you can transform these boxes into amazing gift boxes and more for almost zero dollars!  Christmas is right around the corner and these would be a perfect no-wrap addition to your holiday gift-giving.


Note: Please be advised that Plaid Enterprises, Inc. has compensated Make it easy crafts by furnishing Plaid product at no charge in connection with this post.


Materials:


A subscription box with cover

Gesso or white paint

Paintbrush

ModPodge decoupage medium

Printed napkin

Ruler, scissors

Ribbon

Hot glue gun and hot glue


Instructions:


First, gather all your supplies.  Next, cover your work surface.  Then, use the paintbrush and some Gesso or white paint to cover the writing or advertising print on the top and sides of the box.  You may want to paint the entire box top and bottom.  Set aside and let dry completely.


upcycle a subscription box


Choose your napkin and then, remove the extra layer.  You may have to cut a piece to see where it can come apart.  Most napkins have a print layer and a solid layer.  Discard the solid layer.


Now measure and cut strips and pieces to fit on all sides of the box.  Cut pieces for the top, bottom, sides, etc.  Work on one section at a time taking care not to touch the wet areas with your fingers, only use the brush for placement. 


Using the ModPodge brush a thin layer of medium on each area attach the corresponding napkin pieces and then immediately brush a layer on top. Work all around the box adding pieces of the napkin.  Let dry


upcycle a subscription box

upcycle a subscription box


When the entire piece is dry, brush a thin layer of ModPodge over every area and let dry completely.


Draw a bead of hot glue over the top of the box sides and attach a strip of decorative ribbon all around.  The subscription box is now ready to enjoy anew!


upcycle a subscription box

upcycle a subscription box

Check out all the other decoupage and various craft tutorials on Make It Easy Crafts today!


Tuesday, July 28, 2020

How to make adorable little origami red elephants for earrings

origami red elephants


Elephants are considered good luck in many countries, especially with the trunk raised.  Just, grab some origami paper and you can fold these origami red elephants and make the cutest pair of earrings.  Or you could just stand them up as a mini decoration.  Use the photos as a guide and you will find although tiny, they are not that hard to fold.

Adorable mini origami red elephants


Materials:


Origami paper, red
Nail file

Optional for earrings: 

Needle and head pin 
Needle nosed pliers 
Fishhook ear wires
Wire cutters

Instructions:


First, cut a piece of red origami paper 1 ½” x 3 ½” for each origami elephant.

origami red elephants


Next, fold the paper in half lengthwise.  Turn, and fold the two top edges to a point (like you are making a paper airplane) Fold a second time to make a longer point. 


Turn and fold so that the folded point touches the other side.  Turn over so that the point is on the underside.  Now, fold the folded edge over so it meets the crease, but as you make this fold flip the point back to the front.


Then, fold the left edge under so it meets the center crease. Then fold the bottom folded edge of the point to the edge of the paper.  Then fold the point over to the left, and fold back again to make a kind of fanfold. (Front of the elephant) For the back, fold the flat folded edge over so it meets the center crease and then flip the edge back to the front.  (See photo)


Turn over the paper.  This is the only tricky part so use the photos as a guide.  You will see a kind of rectangle shape.  Just fold the top layer fold the corners inward.  Turn and do the same to the opposite side. Now, it is easier to take this in your hand to do this part, push the folded corners down and press open.  Do the same thing to the opposite side and then flatten them all down.  Use your fingernail or a nail file to make the creases. 


Fold in half. Fold the back legs in so they match the front.  To make the ears, squeeze and fold at an angle making the creases for the ears on each side of the head. The trunk will point down. 

origami red elephants

origami red elephants

origami red elephants


Finally fold the trunk, up, and then back to make the trunk raise.  The red origami elephant is finished.

origami red elephants

origami red elephants


To make these into earrings, using a pint push through the underside to make a hole and insert a headpin.  Cut the headpin down if necessary. Then, use the needle-nosed pliers to twist into a loop adding the fishhook ear wires. Close loops.


Thursday, June 25, 2020

How to recycle an old CD into stunning monogram framed art

So, I recently had my studio completely redecorated.  And since the walls were newly painted and bare, I decided to make it personal.  What better way than to recycle an old CD into a monogram to hang on the wall?  

Paint your frame in a faux verdigris style to match your green paper.  The recycled old CD pieces will catch the light with color.

This is an easy project that you can create in no time.  So, let’s get started

Note: Please be advised that Plaid Enterprises, Inc. has compensated Make it easy crafts by furnishing Plaid product at no charge in connection with this post.

recycle an old CD

How to recycle an old CD into monogram framed art

 Materials:


Old CD
Scissors
Wooden Frame
Piece of scrap green mat board or card stock to fit your frame
Tacky glue
Small sponge
Paintbrush
Paper plate or palette
Pencil 

Instructions:


First, use the scissors to cut the CD into small pieces of various shapes and sizes.  Next, draw a letter of choice on the card stock or mat board lightly in pencil.  Then, working in sections, add some tacky glue and fill in your letter with the CD pieces.  Let dry.  When it is dry you can brush a coat of ModPodge over the entire piece.  Set aside.


recycle an old CD

Decorate the frame


Cover your work surface.  Using the brush and Pewter grey paint, cover the entire surface and sides of the frame. 


Next, while the frame is still semi-wet dip your sponge in the mint green paint and lightly tap over the entire surface and sides of the frame.


Finally, rinse your sponge and sparingly pat on some gold paint and let dry.


When the frame is dry brush on some ModPodge to protect the frame and hang where desired.

recycle an old CD


recycle an old CD