Showing posts with label Earth Day. Show all posts

Saturday, August 13, 2016

Make this cute wiggly bird magnet quick and easy

Recycled Wiggly bird magnet


You can make this fun wiggly bird magnet from a recycled soda can.  I bet you didn’t know that soda cans are so easy to use for crafting.  It’s bendable, lightweight and cuts like a dream.  And best of all it’s free and recycled so it won’t end up in a landfill. 

When you attach the magnet to a wire spring a little touch make this a very wiggly bird!  So, lets get started.

Materials:

Soda can
Duct tape in any print you choose
24-gauge wire
Needle nosed pliers
Wire cutters
Scissors
Craft knife and self-healing cutting mat
Pencil
Wiggle eye
Ceramic magnet disc
Hot glue gun and hot glue sticks


Directions:

1.     First you will need to cut the soda can top and bottom off.  Be careful when cutting.  Cut it into a rectangle.  Bend the rectangle in the reverse direction of the can so that it lays semi-flat.

Recycled Wiggly bird magnet

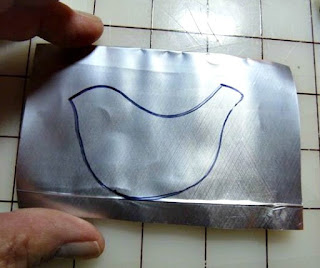
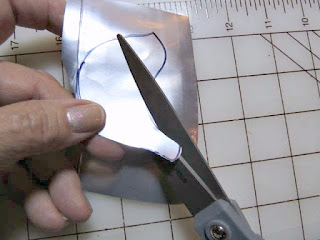
2.     Download and print the bird pattern.  Now trace the bird pattern onto the aluminum can piece and cut out.

Recycled Wiggly bird magnet


Recycled Wiggly bird magnet


Recycled Wiggly bird magnet


3.     In the next step, cut two pieces of duct tape and cover the bird on the cutting mat.  Press all around the edges with your fingers.  Cut all around ¼” bigger than the bird using the craft knife.  Peel up and off the mat.

Recycled Wiggly bird magnet


Recycled Wiggly bird magnet


Recycled Wiggly bird magnet


Recycled Wiggly bird magnet


4.     After you remove the duct tape covered bird and turn to the back.  Make little slits all around the duct tape to the edges and fold back. 

Recycled Wiggly bird magnet


Recycled Wiggly bird magnet


Recycled Wiggly bird magnet


5.     In the next step cut a piece of duct tape to fit over to cover the back evenly and press to adhere.  Use the hot glue gun to attach a wiggle eye to your bird. Bend the bird to curve slightly. Your bird is now ready to add the magnet and make her wiggle.

Recycled Wiggly bird magnet


Recycled Wiggly bird magnet


Recycled Wiggly bird magnet


Recycled Wiggly bird magnet

6.     Wind a piece of 24-gauge wire around a pencil about 1 ½” up.  Cut off with wire cutters. 

Recycled Wiggly bird magnet

7.     Using a hot glue gun attach the end of the coiled wire to the back of the magnet let it set.  Then attach it to the back of the bird with some more hot glue.

Recycled Wiggly bird magnet


Recycled Wiggly bird magnet

Recycled Wiggly bird magnet


Recycled Wiggly bird magnet

8.     Attach to any magnetic surface.  Slightly touch the bird and you will be amazed at how she wiggles!


Wednesday, May 18, 2016

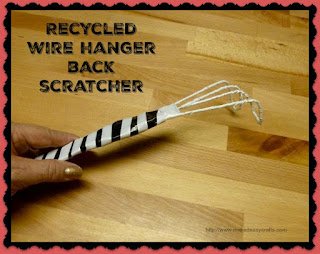
Recycled wire hanger back scratcher

Recycled wire hanger back scratcher


Do you have an itch for a back scratcher?  Before you go searching for a family member to scratch or rub against a doorframe like a bear why not make one?  And the best part is that you can make it from something your probably already have hanging right in your closet.   Who doesn’t have some of those wire coat hangers from the cleaners?  You can recycle them into cute back scratchers with simply duct tape and ribbon.  Use two wire coat hangers to make a cute, very green and useful back scratcher. 

I hang mine from the claw end right in my laundry room, but you can easily add a loop to hang from the handle.

Materials:

Two wire coat hangers
Wire cutters
Needle nosed pliers
Duct tape (I used black but you can use any one of dozens of prints available in craft stores)
¼” satin ribbon in a color of your choice
Hot glue gun and hot glue sticks

Instructions:

1.     Twist apart two wire coat hangers.  Cut off the hook end to the part where it doesn’t curl. 

Recycled wire hanger back scratcher

Recycled wire hanger back scratcher


2.     Bend each of the wire hangers to a long rectangular shape.  Place both hangers together.  Attach the two ends together at the separate ends with some duct tape.   Attach the other two ends together over the first ones going through the loops. (See photo)

Recycled wire hanger back scratcher


Recycled wire hanger back scratcher

Recycled wire hanger back scratcher

Recycled wire hanger back scratcher

Recycled wire hanger back scratcher


3.     You now have the wires together with two finger like loops at each end.  Pull apart the loops on one end. (This will be your scratcher and the other side will be the handle end)

Recycled wire hanger back scratcher


4.     Wrap the handle side with duct tape three quarters of the way down.

Recycled wire hanger back scratcher

Recycled wire hanger back scratcher


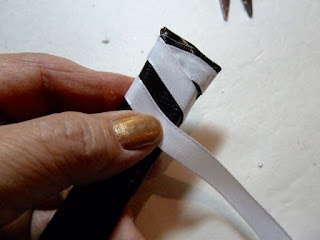
5.     Use a bit of hot glue to attach the end of some satin ribbon to the handle and begin wrapping tightly down the handle.

Recycled wire hanger back scratcher

Recycled wire hanger back scratcher

Recycled wire hanger back scratcher


6.     When you reach the area with no duct tape continue to wrap the ribbon tightly all around the fingers of the scratcher.  Down one loop and continue over to the next one.

Recycled wire hanger back scratcher


7.     When you have covered both sides of the fingers, wrap a few times around the base of the handle and attach with some hot glue.

Recycled wire hanger back scratcher


8.     Using the needle nosed pliers, bend the fingers down to make a sort of claw. 

Recycled wire hanger back scratcher

Recycled wire hanger back scratcher


Thursday, April 21, 2016

Patriotic mini wearable hat - recycled craft

Patriotic mini hat


Memorial Day and July 4th is on its way and you can be prepared with a patriotic mini hat wearable!  You can wear this little patriotic mini hat by with the handy hair clips under the brim at all your parties and events.  And the best part of all is that you make it from an up-cycled Jell-O or pudding cup.  The kids will love to make these little hats.  You can optionally add some elastic string to the brim so the kids can easily wear them.

Supplies:

·      Jell-O or pudding cup, washed and dried
·      Acrylic paint in red and white
·      Heavy cardboard or mat board in blue
·      Star ribbon
·      Red rattail ribbon
·      Scissors or craft knife
·      Corrugated cardboard piece to protect your work surface
·      Paper plate to hold the acrylic paint
·      Small paintbrush
·      Hot glue gun and hot glue sticks
·      Two alligator clips or optional string elastic
·      Compass
·      Blue sharpie marker
·      Optional: string elastic and awl or nail

Instructions:

1.     Paint white strips on the cup with the white acrylic paint and let dry.  After the white paint has dried paint red stripes next in the spaces next to the white stripes.  Let dry.  After it has dried add another coat of both colors if needed.

Patriotic mini hat

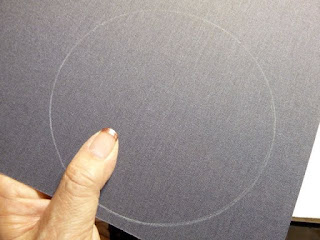
2.     Using the compass draw and cut out two 2 ½” diameter circles from the heavy blue mat board.  In the center of one the 2 ½” diameter circles cut out a 1” diameter circle.  This will fit over the cup to form the brim.

Patriotic mini hat

3.     Use the blue sharpie to color the edges of the circle if they are white.

Patriotic mini hat

4.     Fit the mat board/ cardboard brim over the painted cup and glue to the lip of the cup.  Glue the smaller blue piece of mat board or heavy cardboard to the top of the hat.

Patriotic mini hat

Patriotic mini hat

5.     Measure around the brim area and cut a piece of 1/4” wide star ribbon to fit around.  Use the hot glue gun to attach.  Glue rattail ribbon around the edge where the brim meets the hat to fill in any gaps.

Patriotic mini hat

6.     Glue the second mat board/cardboard large circle to the bottom open part of the hat with some hot glue.


7.     Attach two alligator hair clips to the bottom of the hat. 


Optionally:   make two holes on either side of the brim and thread some string elastic through the holes an knot them.