Tuesday, February 27, 2018

Easy how to make - Super simple 4-leaf clover hair bow

4-leaf clover hair bow


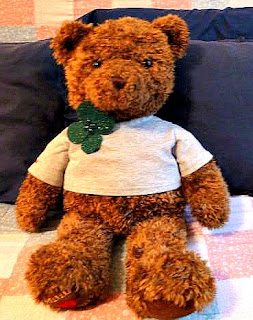
Everyone will love this super simple 4-leaf clover hair bow.  It’s so easy to make with simple supplies you may already have on hand.  And this cute little 4-leaf clover hair bow is so inexpensive you may want to make several for a group or gifts. 


4-leaf clover hair bow


Materials:

Dark green sparkle stiffened felt sheet (you can make several out of one sheet)
Four green teardrop cabochons
Alligator clip
Hot glue gun and hot glue sticks
Scissors
Chalk pencil to mark on dark felt
Optional clover ribbon to cover alligator clip

Instructions:

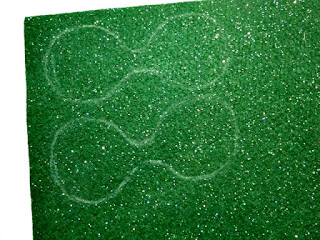
1.     First, download and print the clover pattern.  Transfer the pattern on to the stiffened felt.  Repeat for a second piece.  (You will need two)

4-leaf clover hair bow


2.     Next, cut out the two pattern pieces.

4-leaf clover hair bow

3.     Now, cut a piece of Bowdabra bow wire about 18” long.  Fold the wire in half and insert into the Bowdabra.  You will have a loop on one side and two loose wires on the other.  Tuck the ends under to keep out of the way while you make your hair bow.

4-leaf clover hair bow

4.     Insert one of the felt pattern pieces into the Bowdabra in the center. Then, insert the other pattern piece.  Scrunch down with the Bowdabra wand.

4-leaf clover hair bow

4-leaf clover hair bow

Finishing your hair bow

5.     Now, insert the two loose wires through the loop and pull tight while the bow is still in the Bowdabra.  Remove from the Bowdabra, turn to the back, separate the ends and tie a knot.  At this point, you can arrange the leaves of the clover.  Set aside.

4-leaf clover hair bow

4-leaf clover hair bow

6.     Arrange the teardrop cabochons around the center of the clover and use a hot glue gun to attach. 

4-leaf clover hair bow

4-leaf clover hair bow

4-leaf clover hair bow

7.     If you want you can use some thin St. Patrick’s Day ribbon and some glue to cover the alligator clip.  Glue to the back of the clover. Glue the alligator clip to the back of the 4-leaf clover hair bow.

4-leaf clover hair bow

Since this hair bow is flashy but so inexpensive it is a great project for Girl Scout and other youth groups.  If you don’t wish to use a glue gun you can, however, substitute glue dots. 

This is fun for St. Patrick's Day and you can wear it as a hair bow, or simply clip it on your collar or lapel.  Please visit Make it easy crafts again for more fun and easy crafts.

4-leaf clover hair bow


Tuesday, February 20, 2018

How to make the best Easter Bunny wreath

Easter Bunny wreath


It’s time to get your Easter on.  And this Easter Bunny wreath is so easy and fun to make in a matter of minutes.  Burlap ribbon roses are so in vogue right now and you can make them with some ribbon, glue or a stitch here and there and they will be ready for your wreath.  I add some glitter ribbon roses for some extra flash and my Easter Bunny wreath is ready to hang.

Materials:

2 ½” wired natural color burlap ribbon
2 ½” Glitter ribbon in pink
Wire wreath frame
Hot glue gun and hot glue sticks
Medium gauge wire for hanging the wreath
Bunny head on a wooden stick (available in craft stores)
Lighter

Instructions:

1.    Center the Bunny on the wire wreath frame.  Weave the stick on the Bunny through the bottom wires of the wreath.  Use some hot glue to attach the back of the head to the top of the wreath. 


2.    Next, using the burlap ribbon wrap all around the wreath frame to cover and glue to secure.  Set aside.


3.    Now, make the ribbon roses. Cut a piece of 2 ½” natural colored burlap ribbon 24 inches long.  Begin by burning both ends with a lighter to stop any fraying.  Next, twist the ends around for the center of your rose and put a dab of hot glue to secure. (You may alternatively use a needle and thread to add a stitch instead of glue) Continue twisting and turning, and occasionally adding a dab of glue. Always twist and turn in the same direction. Continue until you reach the end.  Secure with a dab of glue.  Make 5 more so you have six burlap roses. 


4.    Then, repeat step (4) with the 2 ½” pink glitter ribbon for four more roses. 


5.    Attach the roses with some Hot glue to the frame using the photo as a guide. 


6.    Finally, poke a 6-inch piece of medium gauge wire through the top back center and twist to make a hanging loop.


7.    Glue Bunnie’s bow tails to the bottom center to secure. Hang your Bunny Easter wreath on your door or wall.

Tuesday, February 13, 2018

How to make a stylish Chinese New Year Fan with a stunning Bowdabra tassel


You can quickly make this Chinese New Year fan to use for all your themed events and for delightfully different décor.  It’s easy to make with paper and some slim craft sticks.  Then, add the finishing touch to your Chinese New Year Fan with a beautiful Bowdabra tassel. 

Materials:

8 slim wooden craft sticks
Drill with small bit
Heavy corrugated cardboard folded for extra thickness (For drilling holes in the stick)
Scrapbook paper (Cardstock is too thick for this project)
Tacky craft glue
Ruler
Scissors
Scraps of ribbon, yarn, trim, misc. bead strings

1.     First, measure and cut two identical pieces of scrapbook paper 12” x 3”.  You will be gluing them back to back. 

Chinese New Year Fan

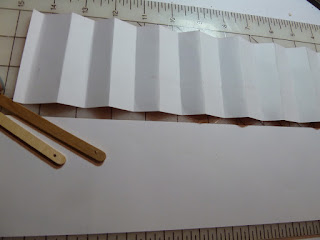
2.     Using only one piece of paper begin to fan fold all the way down.  Make sure they are fairly even folds.  Set the paper aside.

Chinese New Year Fan

3.     Now working on a prepared corrugated cardboard thickness place each craft stick and drill a hole on one end.  For the second and each subsequent stick use the first one as a model by making a mark on each stick for drilling.  This way all your sticks holes will line up evenly when you stack them together. 

Chinese New Year Fan

4.     Next, working on the wrong side of one piece of paper, and smoothing flatter a little bit, begin gluing the sticks on.  Glue the undrilled side flush with the top of the paper. Skip sections so that they will fold with the creases you’ve already made in the paper. 


Chinese New Year Fan

5.     When you’ve glued all the sticks on, glue the other piece of paper on the fan so that the right side (printed or colored side) is on both sides of the fan. Let the glue dry. 

Chinese New Year Fan


6.     Now follow your creases and fan fold so that the fan folds properly.

Chinese New Year Fan

Chinese New Year Fan


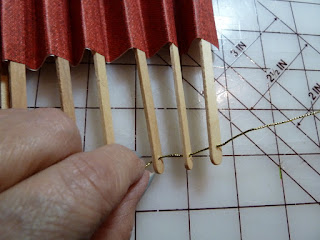
7.     Next, put a dab of tacky glue on the end of a piece of gold Bowdabra bow wire and let dry.  This will allow it to go through the holes in the craft sticks without fraying.  Thread it through all the sticks and then tie a knot loosely. fold any excess paper over on the ends and glue to the first stick.

Chinese New Year Fan

Chinese New Year Fan

Chinese New Year Fan

Chinese New Year Fan


8.     To make the tassel cut an 18-inch length of Bowdabra bow wire, fold in half and place in the Mini Bowdabra.

Chinese New Year Fan


9.     Begin adding lengths of miscellaneous ribbons, threads, cords or other scraps into the Mini Bowdabra.  Then scrunch down with the Bowdabra wand.

Chinese New Year Fan

Chinese New Year Fan

10. For the final step pull the two loose wires through the loop and pull tight while the tassel is still in the Bowdabra. Then, remove the tassel from the Mini Bowdabra, turn to the back and tie a knot.  Cut another piece of Bow wire and wrap around the tassel about ½” down from the top.  Continue to wrap the wire and then tie a knot and cut off any excess wire.  Trim your tassel as desired and tie to the bottom of the fan.


Chinese New Year Fan

Chinese New Year Fan