Friday, December 21, 2018

The continuing adventures of Chicky loves christmas

I hope you are enjoying the adventures of Chicky the sweetest sweet potato.  In a world where every time you hear the news it makes you sad. Chicky is so sweet (Of course, she is a sweet potato) that she makes you smile.  She is kind; she loves everyone, and most of all Chicky loves Christmas.  

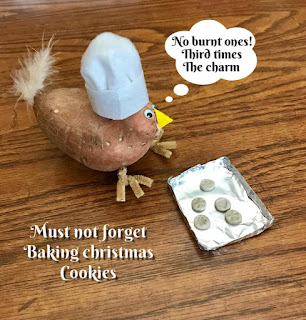
Chicky loves to bake Christmas cookies.  Sometimes they don’t always come out the way she wants them to, but she smiles and keeps on baking!

chicky loves Christmas


Chicky always thinks about those less fortunate.  She gives to charities and because of her kindness sometimes the phone doesn’t stop ringing.  Chicky doesn’t mind if she can help someone.

chicky loves Christmas


Chicky adores the simple things in life.  Whether it is a cup of cocoa, a snow globe, family gatherings, or music, Chicky loves it all.  We all would do well to copy Chicky and learn to appreciate what others may overlook.

chicky loves Christmas


Chicky loves everyone. She doesn’t care what they look like or how much money they have. 

chicky loves Christmas

And of course, Chicky always loves a party!


Chicky and George Bailey both believe that it is a wonderful life. And you can never have too many angels.  So ring those bells!


So the big day is almost here and Chicky has so much more to do before then.  So keep coming back and remember Chicky loves comment love too!


Sunday, December 16, 2018

Welcome to the adventures of Chicky the sweetest sweet potato

Chicky sweet potato


So this Thanksgiving when preparing my family’s dinner, I met Chicky.  This little sweet potato stood out from the crowd.  She looked just like a little bird and with a little crafting magic she almost chirped.  

So Chicky became a member of the family.  And, Chicky Love’s Christmas!  Pretty soon Chicky was all over the place getting ready for her favorite holiday.  

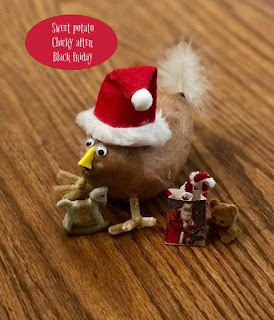
First, Chicky went shopping on black Friday and lo and behold she got plenty of gifts for everyone on her list!  When she went to wrap her presents, the scissors kept disappearing!  

chicky sweet potato

chicky sweet potato


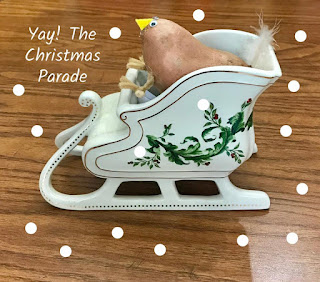
The very next day she got to ride in the Christmas parade! 

chicky sweet potato


While Chicky was at the mall she got to see Santa and told Santa all she wanted for Christmas was peace. I sure hope Chicky gets her gift.

chicky sweet potato


Then, just to get in the right mood she came home and binge-watched Christmas movies one after the other. The sappier the better!

chicky sweet potato


Chicky loves all things Christmas and she loves to read.  One of her favorite books is “A Christmas Carol.”  There is no “Bah, humbug, “ for this chick!

chicky sweet potato


“All aboard!”  Yup, Chicky got to ride the polar express and of course, she got a bell to bring home.  She doesn’t have any problem believing.

chicky sweet potato


When Chicky got home she found a gift in her mail.  She’d won a major award!  Hmmm, what could it be?

chicky sweet potato


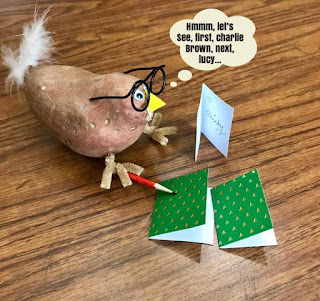
So she sat down and wrote out her Christmas cards.  She doesn’t forget anyone not even Charlie Brown.  

chicky sweet potato


Next, Chicky thought she would check out the Christmas lights before she put them on the tree. Wouldn’t you know it!  One bulb, one tiny little bulb was blown out and now all the others were dark.  Chicky, who is a very amiable sweet potato most of the time got in a very un-Christmassy mood!

chicky sweet potato


It started to snow, however, and cheered her up a lot so she decided to build a snowman and go sledding!

chicky sweet potato

chicky sweet potato


And Chicky is not done yet. There are still 9 days left till Christmas so come back and see more of Chicky the sweetest potato’s adventures.  

Thursday, October 25, 2018

How to make fun Halloween eyeball ring party favors

Halloween eyeball ring party favor


If you want to make some Halloween fun try these quick and easy Halloween eyeball ring party favors!  They are inexpensive and you can make enough for a crowd in no time.

Attach the Halloween eyeball ring on to a lollipop before and you will have two gifts in one!

Halloween eyeball ring party favors


Updated: October 2018

Lets get started:

Materials:

Round felt stickers (I used eyeballs)

¼” wide black elastic

Ex-acto or craft knife

Small paintbrush

Lollipops (I used blow pops)

Pen or pencil

Ruler

Tacky glue

1.     You will need two round felt stickers for each mask/ring.  If the motif has any dimensional felt applied peel it off of the one you delegate as the bottom.  Only one side faces up.  Make two marks across from each other with a pen or pencil on the back of the bottom felt motif.  (See photo)


2.     Cut a piece of ¼” elastic 3 inches long.


3.     Cut through the slit marks you made on the back of one motif with an exacto or craft knife.  Remove the backing from the motif you cut the slits in and using the end of a small, thin paintbrush push the elastic through the slits entering through the non-sticky side, fold and adhere each elastic end to the sticky surface.  This is when you should measure to make sure the mask fits on your particular lollipop and pull through tighter or looser as needed.  


Measure your lolly


4.     Remove the backing from the other motif and attach to cover where you attached the elastic.  Slide onto your lollipop.  You may want to add a bit of tacky glue to further reinforce the bond.


5.     When you have eaten the lollipop use the mask as a cute ring.


If you can't find the eyeball felt stickers in your area, don't fret.  Simply cut two circles out of white felt and glue some wiggle eyes in the center.  Draw red lines with a fine line sharpie and make the rings as instructed using the tacky glue to adhere the two pieces together.


Monday, October 1, 2018

How to make these fun little Halloween ghost treat bags

Halloween ghost treat bags

Updated September 2018


Grab the candy and whip out a bunch of these inexpensive little Halloween ghost treat bags.  Your little ghouls will delight at the cute ghost and you are sure to be the g-host with the most!  

And it couldn't be easier or less expensive.  You can pick up packs of these little treat bags in the craft store and simple use paper towels for the ghost!  Fill the Halloween ghost treat bags with candy or little treats and let the party begin! 


You will need:

3” x 4” gift bag with handle in black or orange

White paper towel

Small amount of fiberfill

White thread

Tacky craft glue or Glue gun and glue sticks

Black dimensional fabric paint

1.     Cut a piece of white paper towel 4” x 4” square.  Put a tiny bit of fiberfill in the center and fold down.  Gather the top to form a head and tie into a knot with a small piece of white thread.  Snip off any excess thread


2.      Check the placement of the ghost so that he is centered on the bag. Add a dab of glue on the bag and adhere the ghost head.  Fluff out the ghost body. Let dry.


3.     Add two dots with the dimensional fabric paint on the ghost head to represent eyes and let dry. You can alternately glue on wiggle eyes if you chose. Fill  the bag with candy or small treats. 


Monday, September 24, 2018

How to make the yummiest Strawberry shortcake


Updated September 2018


It used to be that you could only get juicy, delicious strawberries in the spring.  Now you can get them at any time of the year. I usually make them for special birthdays and in my family there are a lot of birthdays in the fall and winter. And everyone loves strawberry shortcake so why deprive yourself of this tasty treat

Even though this is an easy recipe it tastes fabulous for one reason, you just don’t skimp on ingredients. Nothing but real whipped cream and butter will suffice. It is not exactly a diet food I know, but you know what they say about anything in moderation. The full recipe for the Strawberry shortcake is on a free printable recipe card for your convenience. 


Thursday, August 16, 2018


Recipe How to make a simple Greek Moussaka casserole


Being of Greek ancestry I have been around Greek food all my life.  My favorite dish has always been Greek Moussaka.  Moussaka is a savory cinnamon (secret ingredient) spiced eggplant dish.  The common recipe is kind of work intensive with several steps and plenty of layering. With this Moussaka recipe, however, you just toss the ingredients in a casserole with all the usual vibrant flavors!  Bake and enjoy!

Note:  After you dice the eggplant add salt and toss together. 


Easy Moussaka casserole

Ingredients:

1 medium eggplant, peeled and diced into 2-inch chunks
1 sweet onion, chopped
1 ½ lbs. lean ground beef
2 garlic cloves, minced
2 small red potatoes microwaved about 5 minutes so they are partially cooked then diced into 2 inch chunks
1 jar of marinara spaghetti sauce
1 tsp. cinnamon
Salt and pepper to taste


For topping:

1 ½ cups milk
1/3 cup flour
1 egg, beaten
¼ cup grated parmesan cheese

In a large saucepan cook ground beef on medium heat until browned.  Drain.  

Add the onion and garlic and cook for a few minutes more.  Then, add the diced eggplant.  Finally, add the diced potatoes and cook until the eggplant is slightly soft.

Next, add the spaghetti sauce, cinnamon and salt, and pepper to taste, stirring it all together. Remove from heat.

Spray a baking dish with non-stick spray.  Add the eggplant/meat mixture into the pan and set aside.

In a small saucepan add ½ milk and the flour and whisk on low heat till well blended.  Continue adding the rest of the milk while whisking. Next, add the beaten egg and stir until smooth and thickened.  Add the grated parmesan cheese.

Spread the topping on the eggplant/meat mixture in the baking pan and place in a 350-degree oven. Bake for 40 minutes.  


Wednesday, July 18, 2018

How to make a quick and easy doggy treat jar


Updated July 2018

Make this quick and easy doggy treat jar for your best friend.  If you are like me you have little bags of treats all over the place.  Sometimes those zippers just don't seal well and you end up with stale and hard treats.  You don't want your little prince or princess to turn up his or her nose at them.  

So, you can quickly make a personalized treat jar using a simple wide mouth jar some photos of your pet and decoupage glue. You can purchase a jar at the dollar store or even recycle a clear food container.  Easy, inexpensive and so much fun.

You will need:

·      Glass or recycled plastic wide mouth jar (I found one for under $3.00 at Target)

·      Decoupage glue (I use Modpodge available in craft stores)

·      Small paintbrush

·      Computer and printer with all-purpose paper

·      Photos of your dog

1.     Prepare your jar.  If there is a label on a recycled one simply soak it off in some warm water.  If the surface is sticky from the label, rub some peanut butter on it, wipe it off and wash it. Rub down the jar with alcohol.

2.     Load your desired photos onto your computer and put them all in a strip collage using your favorite photo editing program. (This way the photos are all one size).  Simply add the photos and print on all-purpose paper.  You may need a couple strips depending upon the size of your jar.


3.     Cut out each photo.  On a curved surface it is easiest to add the photos one at a time smoothing out any wrinkles with your fingers. (Don't smooth them all out though, wrinkles give it character) It may get a little messy but it washes off your hands easily. Using the small paintbrush apply some decoupage glue on the jar where you would like your photos to go. Press the photos on the wet glue area one at a time. Add a generous amount of decoupage glue on top of the photos.  Keep adding until you have added all the photos you want and let it dry.


4.       Brush a coat of decoupage glue over all the photos one last time and let dry.


5.     Fill with treats and let your pups enjoy their new jar!


Note:  Decoupage glue dries clear.