Showing posts with label Halloween. Show all posts

Thursday, September 2, 2021

How to make a super easy glow in the dark pet bow

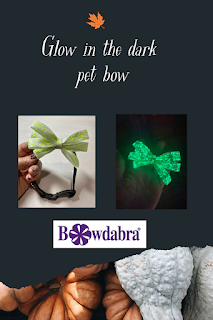
glow in the dark pet bow


You can make an adorable glow in the dark pet bow that is easily attached to the pet’s collar.  Simple attaching a covered hair elastic in a figure 8 position on the back allows easy on and off.  There are lots of glow in the dark ribbons, especially in the fall for Halloween.  The one I used only needs to be under a light for 20 minutes and it will glow for approximately 8 hours.  


How to make a super easy glow in the dark pet bow


Materials:


  • Glow in the dark ribbon I used 7/8” wide
  • Covered hair elastic
  • Mini Bowdabra
  • Bowdabra bow wire
  • Hot glue gun and hot glue sticks.
  • Iron and ironing board (optional)


Instructions:


First, cut a piece of Bowdabra bow wire.  Then, fold it in half and insert it into the Bowdabra.  You will have a loop on one side and two loose wires on the other side.  This will serve as your slipknot. Tuck the ends under to stay out of the way while you are making your bow.


Next, cut a 36-inch piece of ribbon of your choice.


Next, lay the ribbon into the Bowdabra right side down.  Then, bring the other side over making a loop.  Twist so that the right side is facing up and make a matching loop.  Continue twisting and making loops until you have four loops on each side.  


Now, scrunch everything down with the Bowdabra wand.  Then, insert the loose wires through the loop and pull tight while the bow is still in the Bowdabra. Remove the bow from the Bowdabra, separate the ends, turn to the back, and tie a knot.  Tie a double knot for extra security. Clip the wire ends.  Adjust and arrange the loops of the bow.


Using, a hot glue gun, twist the elastic hair tie into a figure 8 shape and glue to the back of the bow.  This will allow the collar to slip through both loops of figure 8 elastic, attaching the bow. 


Cut a two-inch piece of matching ribbon.  Fold it in half lengthwise.  Using the glue gun, start from the back and glue the 2-inch folded ribbon to cover the bow going over the already attached elastic.


Feed your collar through both loops of the elastic.  


glow in the dark pet bow

glow in the dark pet bow


glow in the dark pet bow


glow in the dark pet bow


Thursday, October 25, 2018

How to make fun Halloween eyeball ring party favors

Halloween eyeball ring party favor


If you want to make some Halloween fun try these quick and easy Halloween eyeball ring party favors!  They are inexpensive and you can make enough for a crowd in no time.

Attach the Halloween eyeball ring on to a lollipop before and you will have two gifts in one!

Halloween eyeball ring party favors


Updated: October 2018

Lets get started:

Materials:

Round felt stickers (I used eyeballs)

¼” wide black elastic

Ex-acto or craft knife

Small paintbrush

Lollipops (I used blow pops)

Pen or pencil

Ruler

Tacky glue

1.     You will need two round felt stickers for each mask/ring.  If the motif has any dimensional felt applied peel it off of the one you delegate as the bottom.  Only one side faces up.  Make two marks across from each other with a pen or pencil on the back of the bottom felt motif.  (See photo)


2.     Cut a piece of ¼” elastic 3 inches long.


3.     Cut through the slit marks you made on the back of one motif with an exacto or craft knife.  Remove the backing from the motif you cut the slits in and using the end of a small, thin paintbrush push the elastic through the slits entering through the non-sticky side, fold and adhere each elastic end to the sticky surface.  This is when you should measure to make sure the mask fits on your particular lollipop and pull through tighter or looser as needed.  


Measure your lolly


4.     Remove the backing from the other motif and attach to cover where you attached the elastic.  Slide onto your lollipop.  You may want to add a bit of tacky glue to further reinforce the bond.


5.     When you have eaten the lollipop use the mask as a cute ring.


If you can't find the eyeball felt stickers in your area, don't fret.  Simply cut two circles out of white felt and glue some wiggle eyes in the center.  Draw red lines with a fine line sharpie and make the rings as instructed using the tacky glue to adhere the two pieces together.


Monday, October 1, 2018

How to make these fun little Halloween ghost treat bags

Halloween ghost treat bags

Updated September 2018


Grab the candy and whip out a bunch of these inexpensive little Halloween ghost treat bags.  Your little ghouls will delight at the cute ghost and you are sure to be the g-host with the most!  

And it couldn't be easier or less expensive.  You can pick up packs of these little treat bags in the craft store and simple use paper towels for the ghost!  Fill the Halloween ghost treat bags with candy or little treats and let the party begin! 


You will need:

3” x 4” gift bag with handle in black or orange

White paper towel

Small amount of fiberfill

White thread

Tacky craft glue or Glue gun and glue sticks

Black dimensional fabric paint

1.     Cut a piece of white paper towel 4” x 4” square.  Put a tiny bit of fiberfill in the center and fold down.  Gather the top to form a head and tie into a knot with a small piece of white thread.  Snip off any excess thread


2.      Check the placement of the ghost so that he is centered on the bag. Add a dab of glue on the bag and adhere the ghost head.  Fluff out the ghost body. Let dry.


3.     Add two dots with the dimensional fabric paint on the ghost head to represent eyes and let dry. You can alternately glue on wiggle eyes if you chose. Fill  the bag with candy or small treats. 


Monday, October 23, 2017

Halloween freebie! Download the best Halloween puppy coloring page

Halloween puppy coloring page

Do you like to color for relaxation and fun?  Many people, young and old alike are using markers, gel pens, pencils and more to color.  There is evidence that coloring relieves stress.  And in this stress filled world what else could be relaxing, stress relieving and more fun than coloring?  Simply download this free Halloween puppy coloring page, then grab some colored pencils and let the stress fade away!


Monday, October 16, 2017

How to make a fun Halloween spider hairband the easy way

Halloween spider hairband


Do you want to celebrate Halloween but can’t wear an entire costume?  Why not make this fun Halloween spider hairband and you are guaranteed smiles aplenty. 

The Halloween spider hairband is so easy to make with the help of Bowdabra bow maker so you will want to make few for gifts as well.  Wouldn’t it be great to give as a favor at a Halloween party?  Kids, as well as adults, will just love this little spider! 

Halloween spider hair band 


 Materials:

Black hairband
18 inches 1 ½” sheer black ribbon
18 inches Bowdabra bow wire
Black stiffened felt
Black felt (regular)
Black chenille stems
Glue gun and glue sticks
Two Halloween wiggle eyes
Compass with white pencil (To write on black felt)
Scissors
Pinking shears

Instructions:

1.   First, use the compass and white colored pencil to mark 2 ½” diameter circles on both the stiffened black felt and the regular felt. Then, cut out.


2.   Next, cut the black chenille stems into four 4 ½” pieces.  Use the glue gun to attach them to the stiffened felt circle spoke style all around.  Glue the regular felt circle on top to cover and press down. 


3.   To make the legs-- use the pinking shears to cut down the center of each section all around for a total of 8 sections.  After you have cut the leg sections trim them to long rectangles following the lines of the chenille stems.


4.    Now, glue the Felt legs/body onto the hair band.  Bend the legs as desired.  Cut a piece of black felt into a 2-inch circle and glue to the underside of the hair band.


5.    To finish, make the Bowdabra bow spider head.  Cut an 18-inch piece of Bowdabra bow wire fold in half and place in the Bowdabra bow maker.  You will have a loop at one end and two pieces of wire at the other end.


6.    Cut an 18-inch piece of 2 ½” wide sheer ribbon and insert directly into the Mini Bow maker from the top.  The ribbon piles up like an accordion.  Scrunch the ribbon until you reach the end.


7.    Use the wand to push down the ribbon tightly.


8.    Thread the two loose ends through the loop end of the bow wire and pull tightly.  Remove from the Bowmaker, tie a knot on the back and fluff the bow into a rosette shape.


9.   Finally, use the glue gun to attach the Bowdabra rosette to the center of the spider on the hair band. Glue two Halloween wiggle eyes on the front of the rosette at the base.  Then bend the legs as desired.


Halloween spider hairband

Halloween spider hairband