Showing posts with label Seasonal. Show all posts

Monday, October 23, 2017

Halloween freebie! Download the best Halloween puppy coloring page

Halloween puppy coloring page

Do you like to color for relaxation and fun?  Many people, young and old alike are using markers, gel pens, pencils and more to color.  There is evidence that coloring relieves stress.  And in this stress filled world what else could be relaxing, stress relieving and more fun than coloring?  Simply download this free Halloween puppy coloring page, then grab some colored pencils and let the stress fade away!


Monday, December 19, 2016

Quickly make adorable ornaments from laser cut wood

adorable ornaments from laser cut wood


Laser cut wood shapes are available for pennies at the craft stores.  There are ornaments and frames of all shapes and sizes.  And the best part is that they are so inexpensive!

The scrollwork is so elegant and lends itself to quickly make adorable ornaments.  Mom or dad can spray paint the shapes and kids will love to add the beads to them. The resulting ornaments are stylish and classy.  And the memories of creating them as a family will be a lasting treasure.

Materials:

Laser cut wood shape ornaments
Spray paint in gold and silver
Silver, gold, and pearl beads
Tacky craft glue
Tweezers (optional)
Paper or foam plates to work on
Silver or gold cord for hanging

For the snowflake:

Bag of sparkle snow

Instructions:

1.     Spray each ornament in gold or silver and let dry.  Turn over and spray the other side.  Let dry completely.  Work in a well-ventilated area or outside.


2.     Add dots of tacky glue to the shape and attach the silver, gold, or pearl beads as desired.  You can be creative.  Run a ring of beads around the ornament; add to the corners or in the middle.  The sky is the limit.  When you have added the amount of beads you choose let the ornament dry.  You may if you desire turn to the back and add more beads as you did before.


3.     Cut a length of gold or silver cord and attach to the top for hanging on the tree or in a window.

For the snowflake:

1.     Cover the entire silver spray painted ornament with tacky glue.  Work on a paper plate.


2.     Sprinkle the sparkle snow on top and press with your fingers to make sure it adheres.  Let dry.  Add a hanging cord to the top.  You may add a second coat of sparkle snow after the first one is dry if you want a fluffier snowflake.


Wednesday, December 14, 2016

This is the easiest way to make amazing glittery ornament hooks

glittery ornament hooks


Wouldn’t you love some glittery ornament hooks to hang your ornaments this year?

I have a simple tree with mini lights sitting in my foyer and I love to decorate it for every season.  This year I ran out of ornament hooks, sitting at my desk my eyes settled on some paper clips and a light bulb went off.  In minutes I had a bunch of glittery ornament hooks that sparkled and looked like icicles.

You can easily bend the paper clips in simple or even more intricate shapes so you can get as creative as you like.  And kids will love making the hooks and then hanging them on the tree. 

Materials:

Paper clips
Silver or gold glitter
Thin tacky or school glue
Paper plates
Tweezers
Needle nosed pliers (optional)

Instructions:

1.     Bend paper clips as shown. (See photo) You can use needle nosed pliers for intricate shapes or simply shape them with the hands.


2.     Work with three separate paper plates. Add a generous amount of glue on one plate.  Apply an amount of glitter on the second plate. Finally use the third plate for letting the glittery ornament hooks dry.


3.     Now use the tweezers to drop the paper clips in the glue and quickly transfer them to the plate with the glitter, making sure you cover the entire clip with glitter.  Then use the tweezers to transfer the hooks to the third plate.  Let dry.


4.     When the glittery ornament hooks are dry, use them to hang the ornaments.  You can make a bunch in no time and for practically nothing.  You won’t ever run out of ornament hooks again!


Monday, December 12, 2016

How to make a pillow look like a beautiful gift pillow

gift pillow


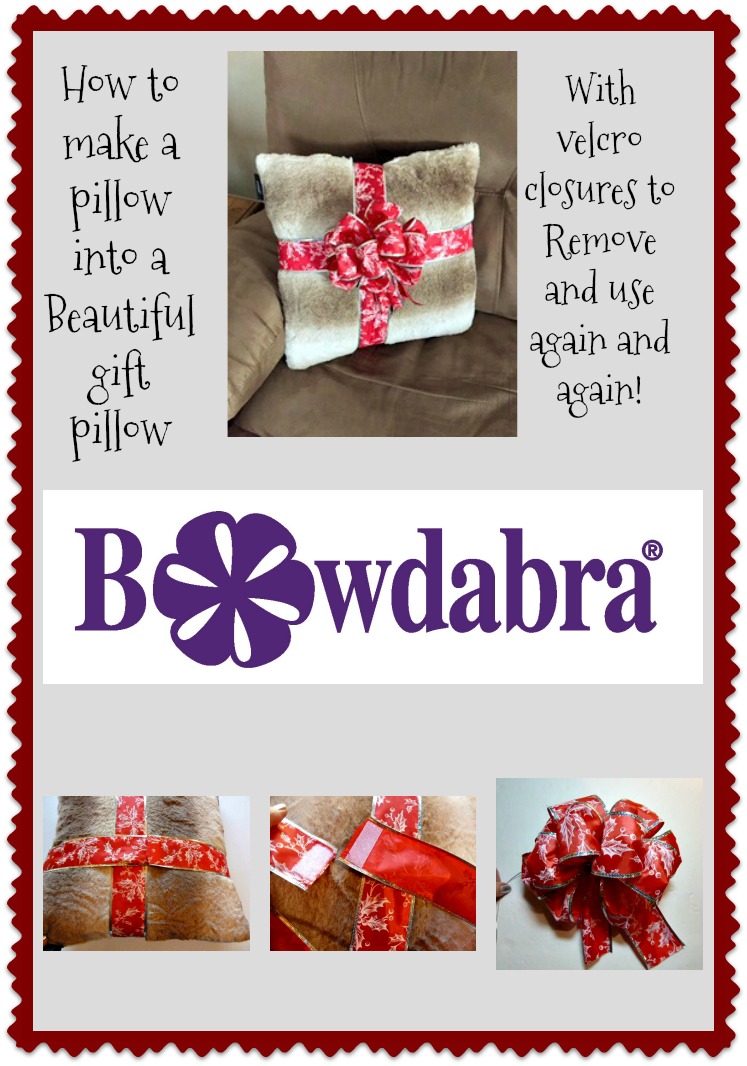
When you are decorating for the holidays use the Bowdabra to make any pillow look like a beautiful gift pillow!  It’s so easy to make a removable package bow which when you attach it to your pillows will make it look exactly like a beautiful gift pillow.

It also is a great way to give a beautiful gift pillow to someone on your list.  Simply purchase a new pillow in a holiday solid color and make the removable package bow.  And no sewing is involved!  Give the pillow to the person of your choice and you won’t have to use any wrapping paper!  Easy!

Materials:

1 ½” wide Christmas ribbon, wired and preferably foiled and not glitter since glitter will get all over everything
Pillow of choice
Bowdabra bow maker
Bowdabra bow wire
Tape measure
Scissors
Hot glue gun and hot glue sticks
Iron on hook and loop tape (Velcro)

Instructions:

1.     Use the tape measure to measure around your pillow vertically.  My pillow was 35 inches.


2.     Cut the ribbon 35 inches long.  Glue it end to end with the hot glue gun.  Slip the pillow in the loop to make sure it fits snuggly but not too tight.


3.     Next cut another length of ribbon 37 inches.  Run a lighter over the ends to keep them from fraying. Fold it to find the center and attach it with some hot glue to the center of the loop you made.  You will have two lengths of ribbon on each side. 


4.     Now, insert the pillow through the loop. Then wrap these two loose lengths of ribbon around to the back of the pillow. Make sure the ends have a little overlapping margin. (This is where you will attach the hook and loop tape)


5.     So now follow the manufacturer’s instructions to iron on the corresponding hook and loop tape pieces on each of the ends of the ribbon. Make sure they are the right sides and attach correctly.  You have the package ribbon and will now make the bow for the center.


6.     To make the bow for the center, cut a piece of Bowdabra bow wire 18” long.  Fold the wire in half and insert into the Bowdabra.  You will have a loop on one side and two loose wires on the other.


7.     To make the bow tail, place the ribbon into the Bowdabra several inches up from the end.


8.     Fold the ribbon to form your first loop. (if your ribbon is not the same on both sides you will have to twist as you insert the loops) Continue folding and twisting the ribbon to form additional loops. Mine was five loops on each side.


9.     Scrunch down with the Bowdabra wand.  Insert the two loose wire ends through the loop and pull tight while the bow is still in the Bowdabra.  Remove the bow, turn to the back and tie a knot.  Fluff and arrange the bow.


Attach the bow to the center of the ribbon package loops with some more hot glue.  Use the Velcro closures in the back to put on or remove from your pillow.


Bowdabra bow makers are readily available online or at most major craft and discount department stores.