Monday, September 26, 2016

Make a quick and easy fun autumn chip clip

autumn chip clip


If your like me your always looking for a chip clip.  So nothing works better than a chip clip that is right where you need it when you need it.  This quick and easy to make autumn chip clip is magnetic so it’s right there on the fridge.  No more stale chips because you cannot find that chip clip in the kitchen drawer. 

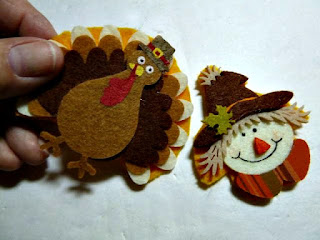
There are so many adorable felt motifs in all sorts of autumn designs.  I found some turkeys (perfect for Thanksgiving) and some scarecrows and even pumpkins.  The sky is the limit.  You can use regular clothespins or like me use the pre-painted fall colored ones.

Materials:

Fall felt motif stickers
Felt scrap
Clothespins in fall colors
Magnetic strips (available in rolls)
Scissors
Hot glue gun and hot glue sticks

Instructions:

1.     Trace around the motif on a scrap piece of felt. Then stick the autumn felt motif on the scrap felt. 

autumn chip clip

autumn chip clip

autumn chip clip

autumn chip clip


2.     Use the hot glue gun to attach the felt motif to the clothespin.

autumn chip clip

autumn chip clip


3.     Next cut a piece of magnet to fit along the backside of the clothespin. Then glue to the clothespin.

autumn chip clip


4.     Put the autumn chip clip on your fridge and it will be there right when you need it.  Decorate for the season with something pretty and useful

autumn chip clip
!

Tuesday, September 20, 2016

Halloween glow in the dark dog bow


Hi there!  I’m over at Bowdabra blog today teaching you how to make an awesome glow in the dark dog bow.  Halloween is on the horizon and you will want to dress up your pet as well as yourself.  You can make this adorable glow in the dark dog bow quick and easy with the Bowabra bow maker with ruler attachment. 

The glow on the bow comes from using glow in the dark duct tape that we made into a kind of ribbon.  This duct tape has a unique fabric like texture that makes it ideal for bow making.  Now when you go out trick or treating with your pooch you will both be a little safer with the blow in the dark dog bow!

The best part is that this dog bow is removable with elastic that easily slides on and off your pet’s collar.

Materials:

Glow in the dark duct tape
Cutting board or any other removable surface
Bowdabra mini bow maker with ruler attachment
Bowdabra bow wire
24” 1 ½” wide orange and black Halloween ribbon
2” 1/8” wide black elastic
Scrap piece of black felt
Hot glue gun and hot glue sticks

Directions:

1.     First make the duct tape ribbon.  Working on a cutting board, cut two pieces of the duct tape 12” long.  Now, carefully stick them sticky sides together.  You will have one piece. 

glow in the dark dog bow

glow in the dark dog bow

glow in the dark dog bow


2.     Next, use a ruler to measure about ¼” wide by 12” long.  Cut two of these strips.  This will be your glow in the dark ribbon.

glow in the dark dog bow

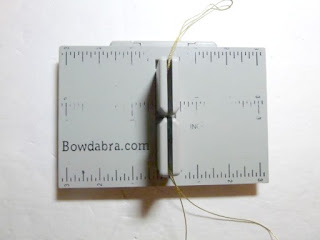
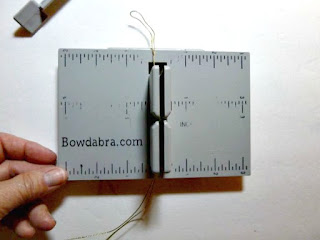
3.     Now to make the bow cut 18” bow Bowdabra bow wire, fold in half and insert into the bow maker.  You will have a loop on one side and two loose wires on the other.  Fold the wires under to keep out of the way while you are making the bow.

glow in the dark dog bow

4.     Then fold the orange and black ribbon in half to find the center.  Insert into the Bowdabra with the wrong side facing up.

glow in the dark dog bow

glow in the dark dog bow


5.     Now bring the right side of the ribbon over and insert the end into the Bowdabra. Then bring the opposite side of the ribbon over the first and under to insert that end into the Bowdabra.  It will look like an X.

glow in the dark dog bow

glow in the dark dog bow

glow in the dark dog bow


6.     Push the first ribbon loop into the Bowdabra.  Then push the second loop into the Bowdabra over the first one. 

glow in the dark dog bow

glow in the dark dog bow

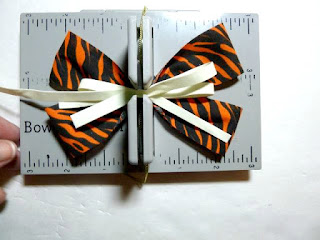
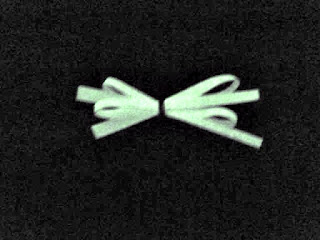
7.     Now take the ¼” strips of duct tape ribbon and fold in half to find the center.  Insert into the Bowdabra. Now make a loop with the right side of the ribbon first.  Then make a matching loop with the other side. 


8.     Repeat step 7 with the second ¼’ duct tape ribbon, so you have two mini bows in the center. Scrunch down with the Bowdabra wand.

glow in the dark dog bow

glow in the dark dog bow

glow in the dark dog bow


9.     Insert the two loose wires through the loop and pull tight while the bow is still in the Bowdabra.  Remove from the Bowdabra, turn to the back, separate the wires and tie a knot.  Then tie a second knot. After you tie the second knot clip the excess wires.

glow in the dark dog bow

glow in the dark dog bow


10. Finish with the elastic attachment.  Cut a piece of black felt ¾” x ¾” and a piece of elastic about 2” long.  (You may need to cut a larger or smaller piece of elastic depending upon how wide your pet’s collar is.

glow in the dark dog bow


11. Finally glue the elastic in a loop on the back of the bow. Cover where it attaches by gluing the felt on that area.  You may slide your bow easily on and off your pet’s collar.  The center bow will glow with a very Halloween-y greenish hue.


glow in the dark dog bow

glow in the dark dog bow

glow in the dark dog bow


Tuesday, September 6, 2016

Download, print and color unique free poodle gift tags


Adult coloring books are all the rage these days and I figured why not incorporate coloring into some cute, free poodle gift tags.  The gift tags are free to download,  print,  and use for any occasion from Christmas to birthdays.  Anyone who loves dogs will adore these gift tags.

And the fun part is you get to relax and color the designed borders and poodles before you attend the event.  It's not just for adults either! This is great fun for kids to do with fine line markers.  Especially when they are getting antsy about going to the party or event.


Thursday, September 1, 2016

How to easily make an attractive apple cider vinegar bottle


You can easily make an attractive apple cider vinegar bottle for yourself or as a hostess gift. 

Decoupage has been around for a long time and if you haven’t tried it, you are missing some great crafting fun.  Bottles of all shapes and sizes are showing up in the craft stores now and they make great surfaces for decoupage.  The bottle I picked up recently is on its way to being a beautiful and unique apple cider vinegar bottle.  Add a beautiful Bowdabra bow and present it to your hostess at your next get together!  Bowdabra bow makers are available at all major craft retailers and online.

To get the apple photos for your decoupage project simply go online and search for public domain pictures.  Find some apple photos you like and print on all-purpose paper.

Materials:

Mod podge decoupage glue
Small paintbrush
Photos
Scissors
Bottle with stopper
Mini Bowdabra bow maker with ruler attachment
12 inches green 1 ½” wide wired ribbon
36 inches red 2 ½” wide wired ribbon
18” Bowdabra bow wire
Printer and all-purpose computer paper
Alcohol

Instructions:

1.     First wash and then wipe the outside of your bottle with alcohol to remove any dirt and oils.


Apple cider vinegar bottle


Apple cider vinegar bottle

2.     Next, search public domain pictures on the Internet to find an apple photo you like.  Print the photo in a workable size.  I printed mine at 4 x 6. 

Apple cider vinegar bottle

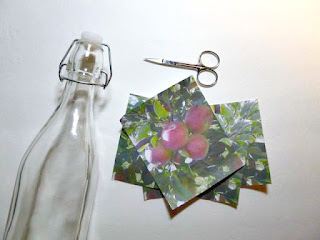
3.     After you print your photo, cut around the leaves and apples with small scissors in a pleasing configuration.

Apple cider vinegar bottle


Apple cider vinegar bottle

4.     Now apply some decoupage glue with a small paintbrush on the front of your bottle.  Immediately place the image on the glue.  Then brush on some more glue on top of the image and over the edges.  (The glue dries clear)
Apple cider vinegar bottle


Apple cider vinegar bottle

Apple cider vinegar bottle


5.     Add another coat of glue to the top and on any areas that are not laying flat.  Use the brush to press the image on the bottle.  Let the glue dry completely.
Apple cider vinegar bottle

Now make the Bow


6.     First cut a piece of Bowdabra bow wire 18”.  Fold in half and insert into the Bowdabra.  You will have a loop on one side and two loose wires on the other.  Fold the wires under the Bowdabra to keep out of the way while you are working.

Apple cider vinegar bottle

7.     Now take the green ribbon, and find the center and insert into the Bowdabra. 

Apple cider vinegar bottle

8.     Next place the end of the red ribbon into the Bowdabra and make a loop to the 3-inch mark on the ruler. Twist the ribbon as you insert it into the Bowdabra to make sure the right side is facing up and make a matching loop on the other side.

Apple cider vinegar bottle

Apple cider vinegar bottle

9.     Twist and make another loop.  On the last loop bring the end under and insert into the Bowdabra.  Continue and make the last loop.  You will have a little loop facing to the right, which will be your round center of the bow.

Apple cider vinegar bottle

Apple cider vinegar bottle

Apple cider vinegar bottle


10. Scrunch down with the Bowdabra wand. Insert the two loose wires through the loop and pull tight while the bow is still in the Bowdabra.  Remove from the Bowdabra, turn to the back, separate the wires and tie a knot. 

Apple cider vinegar bottle

Apple cider vinegar bottle

Apple cider vinegar bottle


11. Lastly, fluff the bow and poof out the center.

Apple cider vinegar bottle


12. For the final touches, use the extra wire to tie the bow to the bottle. Fill with flavored vinegar or apple cider vinegar and display or give as a unique hostess gift.


Apple cider vinegar bottle