

The best time to start working on Christmas ornaments are
before the hectic Christmas season is upon you. In early fall you can make tons of ornaments and when
Christmas rolls around you will be all set. Besides you will need a little time to gather up those wine
corks!
You will need:
·
7 Wine corks
·
7 Beads (I like silver sparkle ones)
·
18 inches of 14-gauge silver wire
·
Wire cutters
·
Needle nosed pliers
·
Tacky glue
·
Glitter
·
Paper plates
·
Sharp pointed awl
·
Ruler
·
Pencil
·
Small paintbrush
1.
Measure and mark ¼” from the end of a wine cork.
(The thicker end that didn’t go into the wine bottle. The end which was inserted into the wine bottle is a tad
thinner than the outside end.) Use
the awl with a twisting motion to drill all the way through the cork. Take it out and drill it the opposite
way to make sure there is a path through the cork. Repeat for the other 6 corks.


2.
Squeeze some tacky glue onto a paper plate and
on another plate pour some glitter.
Use the paintbrush to apply some glue onto each end of the wine corks
and dip into the glitter. Use a
third paper plate to place the wine corks with the glittered ends to dry and
let dry completely.


3.
Using the wire cutters cut an 18-inch length of
14 gauge silver wire.
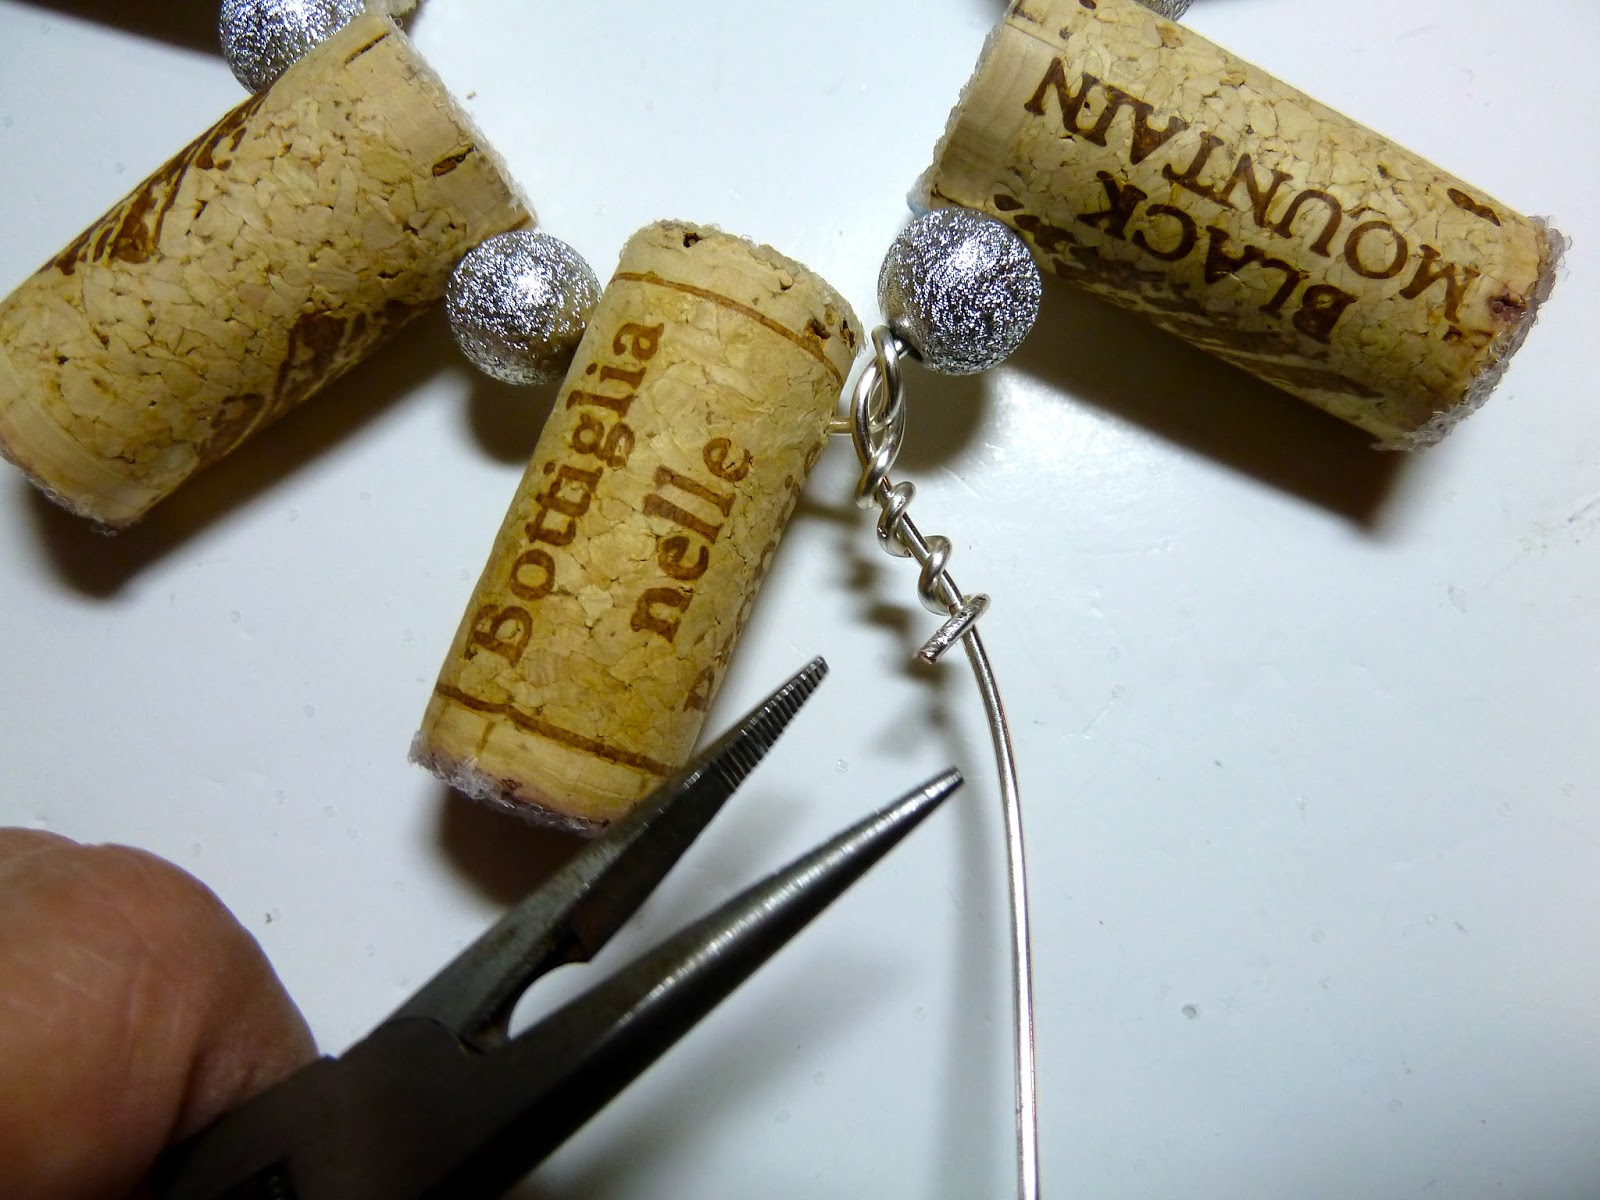
4.
Thread the wire through each wine cork with a
bead in between until you have added all the wine corks and beads.


5.
Use the needle nosed pliers to join the two wire
ends in a circle and twist around to join. Make a loop with the excess and twist around in a pleasing
shape as before.
6.
Adjust the wire into a circular shape. The corks
will form a sunburst star.


Note: You may
eliminate the glitter step if you desire but I think that glitter gives it a
bit of flair. And don't forget there is only one day left to enter the giveaway for the October breast Cancer awareness drop earrings! There is also a tutorial to make some of your own as well right here


What a great idea!
ReplyDeleteTeresa Ann
Very cute! We saved wine corks for years, intending to find something to make with them and we just threw them away. Maybe I'll start saving them again for next Christmas.
ReplyDeleteThank you for joining us at the Share the Love Blog Hop!!!
Cindy from Superheroes and Teacups
This is an excellent idea! My brother and sister-in-law collect wine corks! I'm back from having computer problems! Yepeeee ;o) LOL!
ReplyDeleteSuch a fun idea......I always hate throwing the corks away but now the kids will have fun with them. Thank you for sharing with the Clever Chicks Blog Hop! I hope you’ll join us again next week!
ReplyDeleteCheers,
Kathy Shea Mormino
The Chicken Chick
http://www.The-Chicken-Chick.com
Adorable! I have a book club and we exchange little crafty gifts each season. I have a bunch of corks from a year's worth of book club meetings...no I know exactly what to do with them! ;) Thanks!
ReplyDeleteKim @ Exquisitely Unremarkable
Crystal these ROCK! We love them and thanks for linking it up in our Crafty Showcase! Our newest showcase is here and we hope you stop in and share again! ---> http://bowdabra.com/?p=413
ReplyDeleteSusie @Bowdabra