Showing posts with label upcycled. Show all posts

Thursday, June 9, 2022

How to easily paint tennis shoes that will amaze everyone


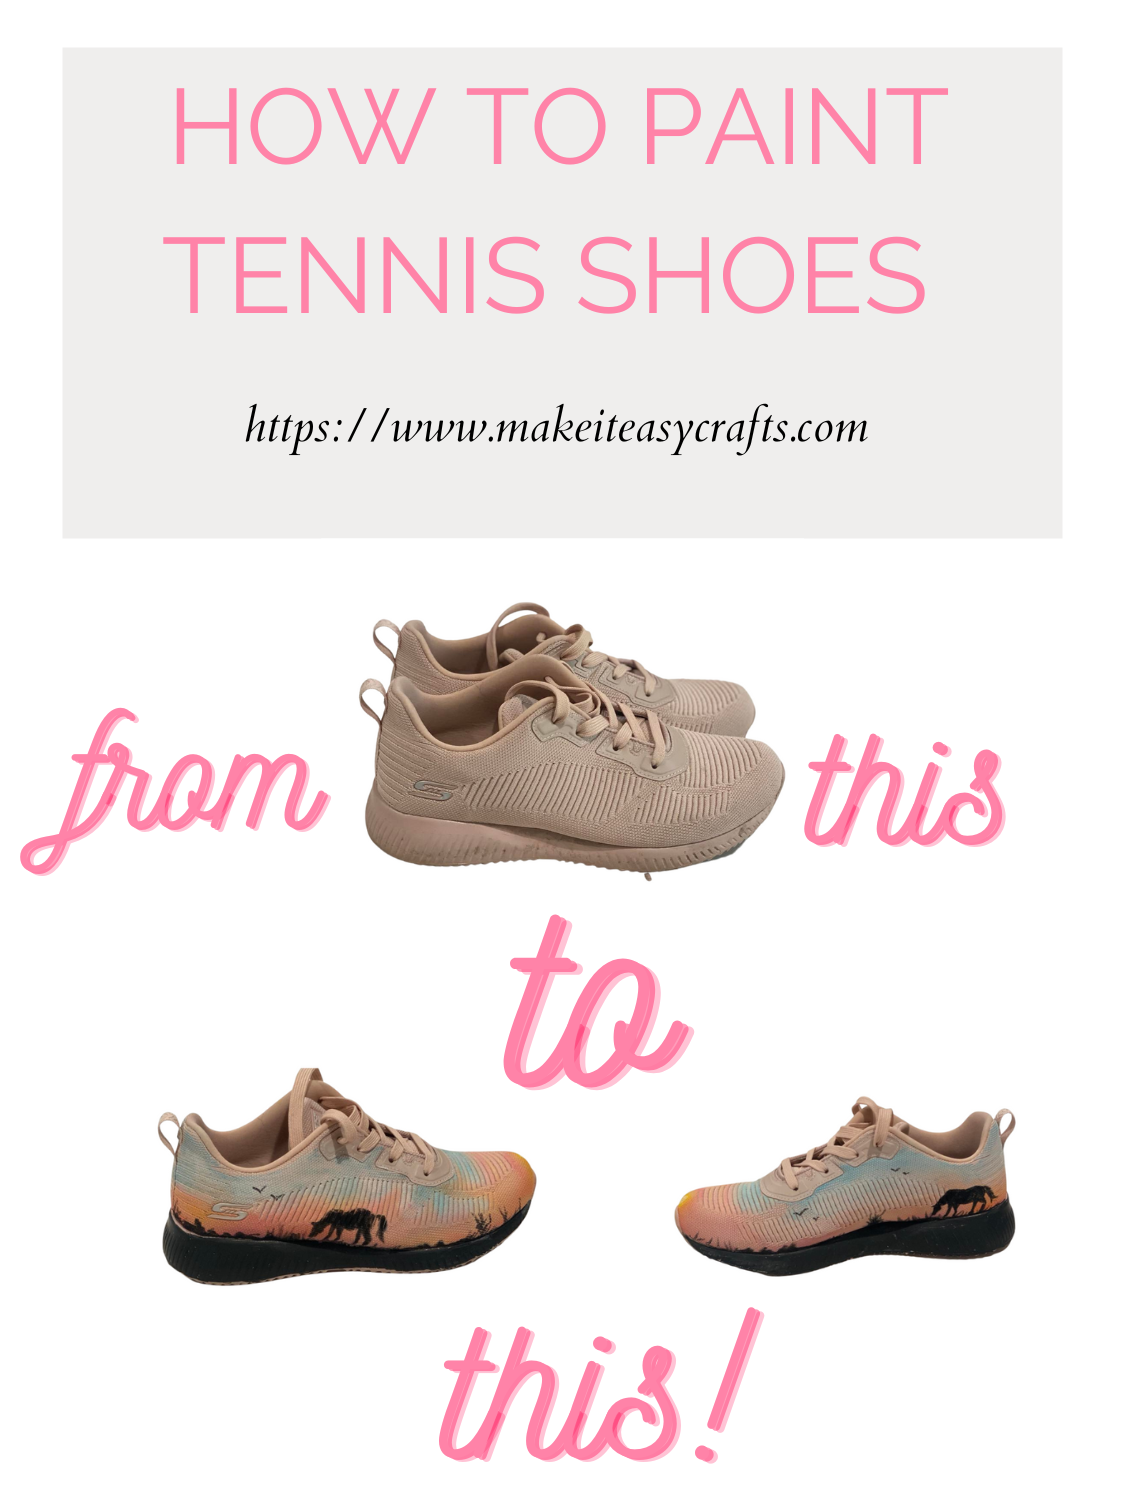
paint tennis shoes


If you are looking for an easy way to upscale your footwear, it is so easy to paint tennis shoes that will amaze everyone.  Using only some acrylic markers, and water you can transform a plain old pair of kicks into a work of art.  And the best part is that it really doesn’t take any special skill.  


Think about it all sunsets are different and there is no wrong sunset if you just follow a few simple hacks.  My pair of shoes started out pink but it is just as easy to paint a white pair or any other color.  I prefer fabric-style shoes. The paint blends very easily on fabric-type shoes.  The advantage of leather shoes, however, is that is leather’s surface is smooth, so detail is easy.  It is just kind of playing around with styles and shoes.  It is best to start with an older pair.


When your sunset is complete you can add small details such as trees, mountains, bushes, buildings, houses, horses, or other favorite things.  Since I am a horse lover, I added them.  Cut out or trace images onto the already dry background and add them with a black paint pen.


How to easily paint tennis shoes

 
Materials:


Tennis shoes

Acrylic markers, black, pink, red, yellow, blue, and white

Water and a small paintbrush

Apron and paper to cover work surfaces


Instructions:


1.      First make sure your shoes are clean.  Launder them if they are soiled.


2.      Us the black acrylic marker to color all around the bottom rubber sides of the shoe.  Let dry completely.


3.     Next, begin at the top of the shoe area by making several marks with a light blue acrylic pen.  Add some white acrylic pen strokes.  Then, while the paint is wet dip a brush in water and blend the blue and white. Make sure there are no lines of demarcation. Work on each section of the shoe separately all around the shoe.


4.     Now, using the pink marker under the blue sky area apply some pink and add some white, and a tad yellow.  Blend with water as you did the upper sky area.  Blend into the blue. Continue working downward adding more pink, blended with water. Then, as you reach the bottom add more red and white, for a darker shade. Continue until you have the entire shoe covered with a sunset.  You may add more white in some areas for an indication of clouds.


5.     Let the paint dry completely before you add the extra images.  Using the black pen, trace and draw in buildings, mountains, animals, etc.  Add grasses with light touches.  Let dry.


Painted tennis shoes


Thursday, October 7, 2021

How to make a sweet little reindeer candy holder party favor


Kids with a little help from mom or Dad can make these little reindeer candy holder party favors quickly and easily.  With just a few supplies (some of them recycled) they are created quickly.  Make one or a few for gifts.


reindeer candy holder party favor


Materials:


  • Mini clothespins (2) 2”
  • Paper cardboard tube from an aluminum foil or paper towel roll cut to 2 ½” long
  • A thin strip of cork
  • Mini cork
  • Colored paper clip
  • Sheer white fabric bag (sold in multiples at craft stores)
  • Brown and black paint
  • Small paintbrush
  • Glue gun and glue sticks 
  • Small wiggle eyes
  • One small red pom-pm
  • Candy for filling
  • Scissors, wire cutters, Needle nosed pliers
  • X-acto for cutting paper towel roll
  • Small ribbon bow


Instructions:


First, cut your paper towel roll to the correct length. and take apart the mini clothespins.


Next, take apart the mini clothespins, and glue them onto the prepared paper towel roll piece so that it stands up. 


reindeer candy holder party favor


Working with the small cork (head.), cut a piece of thin cork in an ear shape and glue it to the back of the cork  (The thicker end) Now, glue the cork on the top of the paper roll with the shorter end facing out. 


reindeer candy holder party favor


Cut the paper clip in half and twist each piece into a pleasing antler shape. Use a nail or pin to make a pilot hole in the top of the head and attach each antler with a little glue.


reindeer candy holder party favor


Paint the entire reindeer with brown paint.  Paint the tips of each leg black for hoofs.  Let dry.


reindeer candy holder party favor


Fill the sheer fabric bag with candy or small treats and insert it into the reindeer's body.  Let the tied end show so it resembles a white tail.


To finish, glue on two eyes, a red pompom for a nose, and add a small bow under the chin.  Your reindeer candy holder party favor is ready to bring smiles and sweetness to your guests.


reindeer candy holder party favor


Friday, August 21, 2020

How to upcycle a subscription box with decoupage


upcycle a subscription box


How to upcycle a subscription box with decoupage


Many people are enjoying internet subscription boxes whether it is for makeup, supplies, just about anything.  A lot of these subscriptions arrive in sturdy two-piece boxes that would be a shame to toss.  What can you do with them?  Well, they make wonderful gift boxes and decorative storage for small items in your home.  


Using a printed paper napkin of your choice and some ModPodge decoupage medium you can transform these boxes into amazing gift boxes and more for almost zero dollars!  Christmas is right around the corner and these would be a perfect no-wrap addition to your holiday gift-giving.


Note: Please be advised that Plaid Enterprises, Inc. has compensated Make it easy crafts by furnishing Plaid product at no charge in connection with this post.


Materials:


A subscription box with cover

Gesso or white paint

Paintbrush

ModPodge decoupage medium

Printed napkin

Ruler, scissors

Ribbon

Hot glue gun and hot glue


Instructions:


First, gather all your supplies.  Next, cover your work surface.  Then, use the paintbrush and some Gesso or white paint to cover the writing or advertising print on the top and sides of the box.  You may want to paint the entire box top and bottom.  Set aside and let dry completely.


upcycle a subscription box


Choose your napkin and then, remove the extra layer.  You may have to cut a piece to see where it can come apart.  Most napkins have a print layer and a solid layer.  Discard the solid layer.


Now measure and cut strips and pieces to fit on all sides of the box.  Cut pieces for the top, bottom, sides, etc.  Work on one section at a time taking care not to touch the wet areas with your fingers, only use the brush for placement. 


Using the ModPodge brush a thin layer of medium on each area attach the corresponding napkin pieces and then immediately brush a layer on top. Work all around the box adding pieces of the napkin.  Let dry


upcycle a subscription box

upcycle a subscription box


When the entire piece is dry, brush a thin layer of ModPodge over every area and let dry completely.


Draw a bead of hot glue over the top of the box sides and attach a strip of decorative ribbon all around.  The subscription box is now ready to enjoy anew!


upcycle a subscription box

upcycle a subscription box

Check out all the other decoupage and various craft tutorials on Make It Easy Crafts today!


Thursday, June 25, 2020

How to recycle an old CD into stunning monogram framed art

So, I recently had my studio completely redecorated.  And since the walls were newly painted and bare, I decided to make it personal.  What better way than to recycle an old CD into a monogram to hang on the wall?  

Paint your frame in a faux verdigris style to match your green paper.  The recycled old CD pieces will catch the light with color.

This is an easy project that you can create in no time.  So, let’s get started

Note: Please be advised that Plaid Enterprises, Inc. has compensated Make it easy crafts by furnishing Plaid product at no charge in connection with this post.

recycle an old CD

How to recycle an old CD into monogram framed art

 Materials:


Old CD
Scissors
Wooden Frame
Piece of scrap green mat board or card stock to fit your frame
Tacky glue
Small sponge
Paintbrush
Paper plate or palette
Pencil 

Instructions:


First, use the scissors to cut the CD into small pieces of various shapes and sizes.  Next, draw a letter of choice on the card stock or mat board lightly in pencil.  Then, working in sections, add some tacky glue and fill in your letter with the CD pieces.  Let dry.  When it is dry you can brush a coat of ModPodge over the entire piece.  Set aside.


recycle an old CD

Decorate the frame


Cover your work surface.  Using the brush and Pewter grey paint, cover the entire surface and sides of the frame. 


Next, while the frame is still semi-wet dip your sponge in the mint green paint and lightly tap over the entire surface and sides of the frame.


Finally, rinse your sponge and sparingly pat on some gold paint and let dry.


When the frame is dry brush on some ModPodge to protect the frame and hang where desired.

recycle an old CD


recycle an old CD