Thursday, July 10, 2014

Grown up Birthday party favor wine glass with Bowdabra bow


You know the dollar store has wine glasses for just a dollar. For a cool party favor for a grown up birthday party go get some wine glasses.  Fill them with purple chocolate kisses and make a multi colored Bowdabra bow for the stem.  Your guests can take their glasses home with them after the party.  If you want to go all out, grab some acrylic glass paint and use the easy tutorial for a confetti painted wine glass.  

You will need:

·      Bowdabra hair bow maker with ruler

·      Wine glass (plain or painted)

·      Various colors of sheer ½” wide ribbon

·      Ruler

·      Scissors

·      Bowdabra bow wire

·      Purple wrapped candy kisses

1.     Cut an 18-inch piece of Bowdabra bow wire.  Fold in half and insert into the Bowdabra hair bow maker with ruler.  You will have a loop on one end and two tails on the other.


2.     Cut four pieces of various shades of sheer ribbon 12 inches each.  Insert the first color to the 2-inch line.


3.     Make a loop on the opposite side at the 2-inch line.  Make a matching loop on the other side.  End by inserting the remaining ribbon in the other side.


4.     Repeat steps 2-3 with the other three colors of ribbon, one at a time.
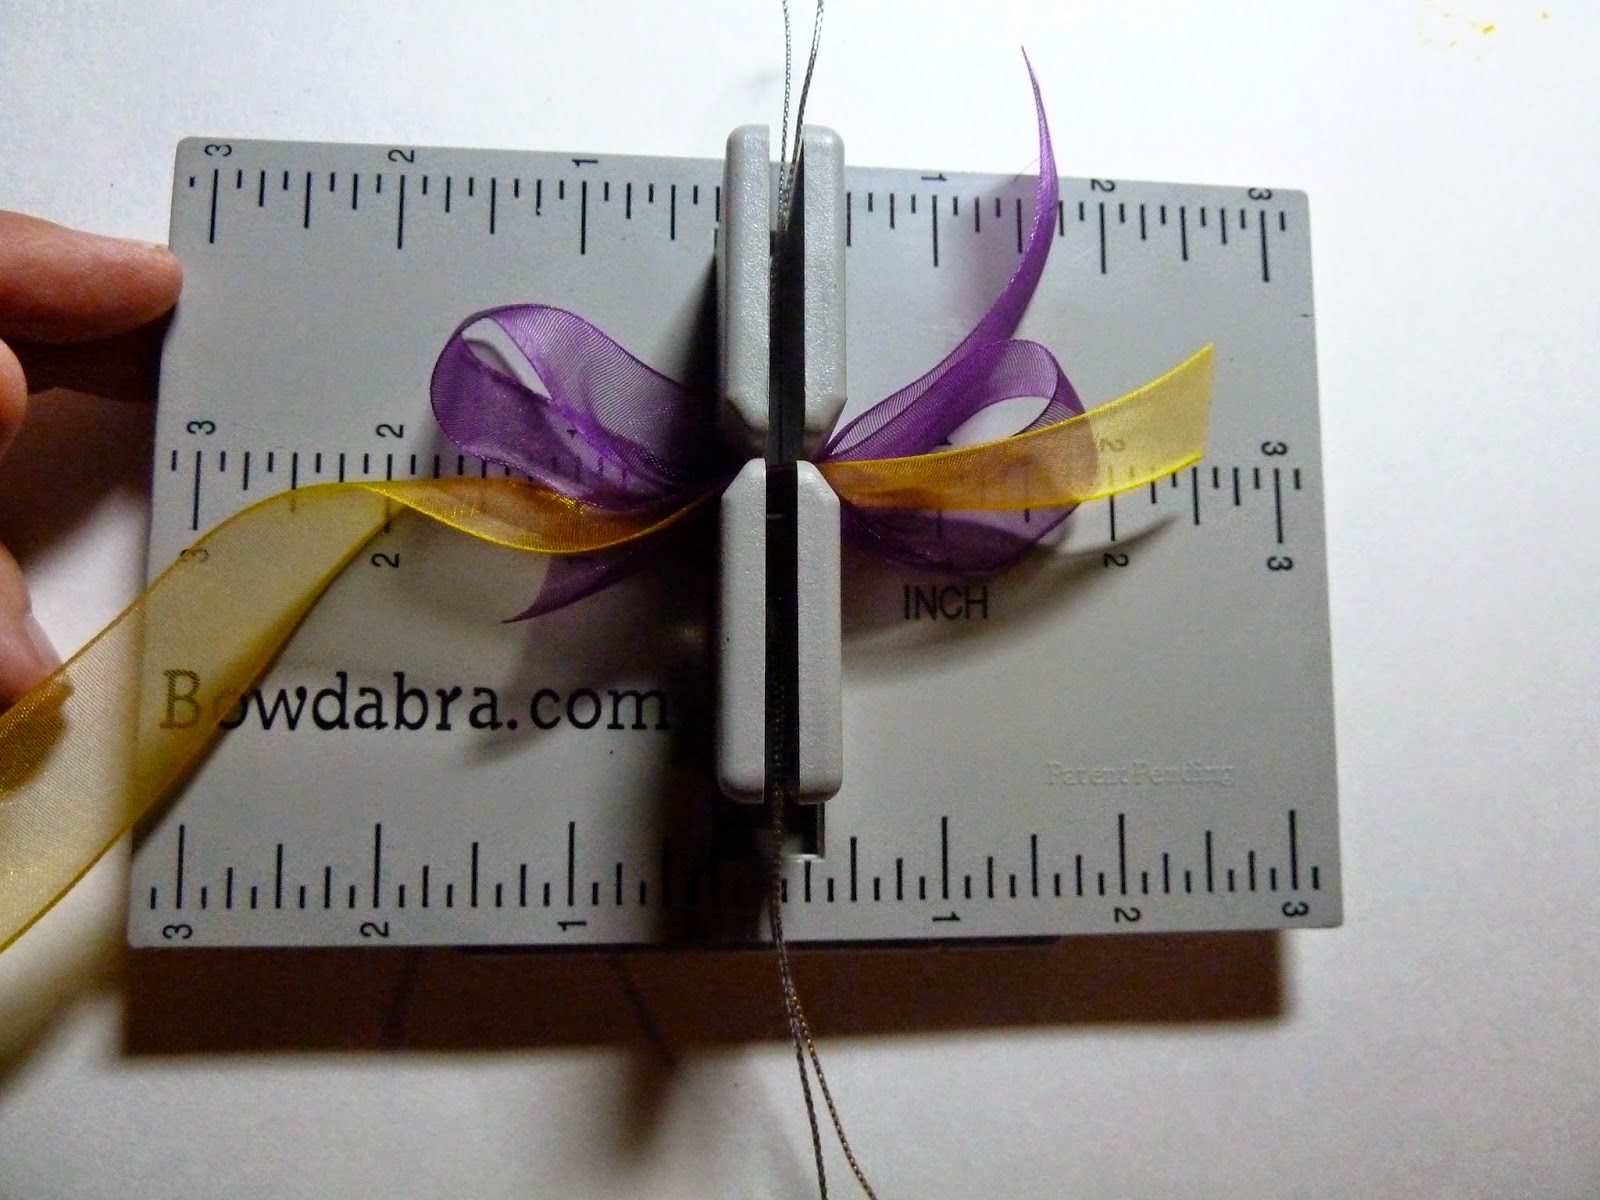


5.     Scrunch down with the Bowdabra wand.  Insert the two tails of the bow wire through the loop and pull tight.  Remove from the Bowdabra bow maker and tie into a knot at the back. Fluff up your bow.


6.     Tie the bow onto the stem of your wine glass and knot.  Use a brush handle to wrap around the bow wire into a corkscrew shape and arrange on the wine glass.


7.     Fill the wine glass half way with purple wrapped kisses chocolate candy.


8.     Place a wine glass at each place setting and your guests can take home their favor!


Tuesday, July 8, 2014

Solo cup wine glasses


It's full on blazing heat of summer here in the south.  Parties, picnics and outdoor fun is the word for the day.  So for your next get together why not whip up some of these Solo cup wine glasses to amp up the fun factor?  I've brought back a favorite tutorial for your enjoyment...The Solo cup wine glasses.  Click for full tutorial...


Thursday, July 3, 2014

Super simple summer pasta salad with cucumber


I’ve been making this pasta salad for years and every time I do it disappears super fast with everyone asking for the recipe. The cool cucumber and sweet pepper gives it just the right crunch. You can whip it up quick as a wink for potluck dinners and all your summer parties and then just sit back and listen to all the compliments, cool as a cucumber!  Oh and if someone asks for the recipe...here it is Crystal's famous macaroni salad.

Recipe:

¼” cup of finely diced sweet onion
1 cup peeled and diced cucumber (about one medium)
¼” cup of diced sweet red pepper (I use the mini peppers you can buy in the grocery stores in bags)
1 lb. elbow macaroni cooked as per package directions and cooled (You can also substitute shells or other pastas)

Dressing

1 ½ cups mayonnaise
¼ cup sour cream
1 tablespoon sugar
2 tablespoons apple cider vinegar
1 teaspoon seasoned salt
½ cup whole milk
Salt and pepper to taste

In a large bowl whisk together the mayonnaise, sour cream, sugar, cider vinegar, milk, and seasoned salt.  Meanwhile cook the macaroni as per package directions.  Cool the macaroni.


Mix together the macaroni and dressing, onions, cucumbers, and sweet peppers. Keep refrigerated. Add salt and pepper to taste. Stir together before serving.  You can make this in advance and the flavors just get better and better.


Sunday, June 29, 2014

Recycled soda can spinner with duct tape


I love creating with recycled materials and soda cans are a great material to work with.  It cuts easily and has limitless uses in crafting!  I made this little spinner with patriotic duct tape for the fourth of July, but you can change the color on the blades to solid and a different color for the center and make all sorts of flower spinners.

You will need:

Empty soda can

Wine cork

Large pushpin

Wooden barbecue skewer or small dowel

Awl or drill with small bit

Duct tape in desired color or colors

Scissors

Needle nosed pliers

Ruler

Compass and pencil

Plastic mat (optional but helpful when cutting duct tape

X-acto or craft knife

1.     Use the X-acto or craft knife to cut the top of the soda can completely off.  (You can use pointed scissors for this step but the X-acto makes a smoother cut with less sharp edges)


2.     Measure two strips of duct tape 8 ½” long.  Begin at the cut edge of the can and apply one strip of duct tape around.  Repeat with the second strip to the bottom thereby covering the can.


3.     Using the scissors cut down the length of the can to the bottom edge.  Measure one inch from the cut piece and cut again.  Continue making approximately 1 -inch strips down the can.  You will end up with 7 strips.


4.     Use the needle nosed pliers to help bend the strips out and down like spokes.  (See photo)


5.     Meanwhile use the compass to mark and cut a 1 ½” diameter circle from duct tape. Attach to the center bowl bottom of can (Which will be the front of the spinner) Use an awl or drill with a small bit to drill a hole in the center.


6.     Trim each spoke ends into a curved petal edge.


7.     To make the spinner spin you need to bend each spoke base at an angle towards the center and pull the blade forward.  Continue around in the same direction, bending each spoke at the base. (See photo)


8.     Drill a hole in the wine cork about ¼” from the edge and insert the skewer or dowel.  Using a large pushpin inset through the hole in the center of the spinner and through the end of the wine cork. This will allow the can to spin freely.


front side

Back side
Note:  Always use care when working with recycled soda cans as the edges can be somewhat sharp.  You can also use a nail file to get rid of small sharp edges.


Wednesday, June 25, 2014

Patriotic July 4th recycled napkin rings and coaster set tutorial


Do you save the tops from containers and even empty paper towel rolls? Have you been looking for a project to use these recycled items? Well, you are in luck because you can use them to make these quick and easy recycled napkin rings and coaster set for your 4th of July celebration.  All you need is patriotic duct tape, an empty paper towel roll, and a plastic 2 in-diameter top for each coaster. (Mine came from a container of breadcrumbs)  You can whip up a whole set in minutes!

You will need:

Empty paper towel roll

Patriotic duct tape print  (Or you can substitute solid colors, red, white or blue)

2-inch diameter plastic top (one for each coaster)

Scissors

Ruler, pencil

X-acto or craft knife

Plastic or cardboard work surface

Gather your supplies


To make the napkin ring:

1.     Measure and mark 1 ¼” from the end of the paper towel roll.  You can flatten it slightly and use the mark as a guide to cut it.  Use your fingers to open it back up.  Cut as many 1 ¼” sections as you need- one for each napkin ring.


2.     Cut a piece of duct tape 5 ¾” long.  Lay the duct tape sticky side up and roll on the paper towel roll ring.  Make sure you center it on the duct tape.  Smooth out any wrinkles.


3.     Use the scissors to cut sections right to the edge around the napkin ring that are overlapping and fold each section inward.  (See photo)


To make the coaster:

1.     Apply two pieces of duct tape to the inside of the plastic top.  Use your finger to press around to reveal the raised center circle.  Using the center circle as a guide, cut around with an X-acto or craft knife.  You may have to go around twice.  Remove the excess duct tape  and you will have a perfect center circle. 


2.     For extra flair cut a piece of duct tape ¼” x 11 ¾” and press around the rim.  Trim off any excess.