Tuesday, January 30, 2018

How to make the best dollar store Mardi Gras party hat

Mardi Gras party hat


If you are looking to make something that will wow everyone and doesn’t cost a lot then head to your local Dollar store.  Pick up the minimal supplies and make the cutest Mardi Gras party hat! I'm over at Bowdabra today showing you how to make this fun little Mardi Gras party hat!

This Mardi Gras party hat is perfect for celebrating!   And you can make enough for the whole party. For less than $5!!

Materials:

Purple sparkle party hats (5 are in a bag at the dollar store)
Mardi Gras beads
Sparkle ribbon
18” 5/8” yellow grosgrain ribbon
Small purple or yellow feather (optional)
Glue gun and glue sticks or alternately glue dots
Two alligator hair clips

1.     First, gather your supplies.  Use glue dots or hot glue to attach the sparkle ribbon all around the hat.  Add two alligator hair clips on the underside of the brim with some more glue.  Set the hat aside while you make your bow.


2.     To make the bow, cut a piece of Bowdabra bow wire 18 inches long.  Fold it in half and place in the Bowdabra.  You will have a loop on one side and two loose wires on the other.  (This will be your slip knot)


3.     Now make your bow.  Cut a piece of 5/8” yellow grosgrain ribbon.  Run a lighter on the ends to seal.  (You may use clear nail polish alternately)  Then fold in half to find the center.  Insert the ribbon into the Bowdabra in the center. 


4.     Then, bring one end around and under and insert into the Bowdabra leaving about a 2-inch tail.  Bring the other end across the first one and twist the tail before you insert it into the Bowdabra so that it is facing the right direction.


5.     You will have what looks like an X on the top.  Now insert the top (X) pieces into the bowdabra with the bottom one first.  You now have a perfect bow. Scrunch down with the Bowdabra wand.


6.     Cut two five inch pieces of Mardi Gras beads and insert them into the Bowdabra. 


7.     Scrunch down with the Bowdabra wand and scrunch down with want once more.


8.     Finally, inert the two loose wires through the loop and pull tight while the Bow is still in the Bowdabra.  Remove from the Bowdabra, turn to the back and tie a knot.  Cut the wires short.


9.     To finish attach the bow to the side of the Mardi Gras party hat with some hot glue. 


Note:  You can pick up Bowdabra products on the internet, most major craft stores, and discount department stores.

Tuesday, January 23, 2018

How to make a quick and easy Valentine's Day magnetic bookmark

Valentine's Day magnetic heart bookmark


This quick to make Valentine's Day magnetic bookmark is so easy that you may want to make a bunch and give them out in a Valentine card to your friends and loved ones.  You can easily sign them before you add the contact paper.  You could even give your sweetie a book of love poems and add the Valentine's Day magnetic bookmark with it.  Change the colors and scrapbook paper print to personalize!  

Materials:

Magnetic sheet, one side adhesive

Scrapbook paper in desired print

Tacky craft glue

Small amount of clear contact paper

Glitter fabric paint, red

Pencil, ruler, scissors

1.     Make a pattern of two small hearts, one a bit larger than the other. (To make a heart pattern fold a piece of paper in half and draw a half heart on the fold. Cut out. Open and you will have a symmetrical heart.)  Play around with different sizes and shapes of hearts.


2.     Using the heart pattern, cut out a large one and a small one from the magnetic sheet.  Cut out a small and large heart from the scrapbook paper as well.


3.     Remove the adhesive backing from the large magnetic sheet heart, line up the corresponding large scrapbook paper heart and attach.  Trim around any overlapping edges. Repeat with the smaller magnetic and scrapbook paper hearts.


4.     Cut a strip of scrapbook paper 6 inches by 2 inches.  Fold 2 inches down from one end. On the unprinted side of the scrapbook paper you can write your Valentine a message if you desire.


5.     Cut two pieces of clear contact paper 6 ½” x 2 ½.” Lay one piece of contact paper adhesive side up and remove the backing.  Place the scrapbook strip print side down on top and adhere.  Remove the backing from the other piece of contact paper and place over the strip already attached to the contact paper.  (Like a contact - paper sandwich)  Trim any edges that do not meet.  Refold where you folded it 2 inches down from the top.

Add your message here


6.     Spread some tacky glue on the larger of the two hearts and adhere to the front of the bookmark (short edge)


7.     Spread some tacky glue on the smaller heart and attach to the area of the back where it meets the front heart, thus magnetizing the two together. (This will keep it on the page)  Let dry completely.  When dry you may decorate the front with small dots of glitter fabric paint if desired.


Enjoy and hope you and yours have a Happy Valentine's Day!

Monday, January 15, 2018

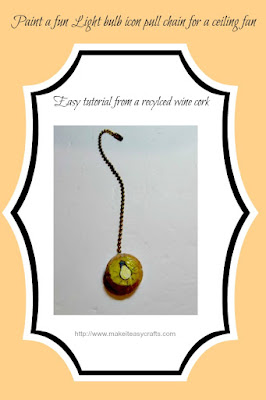
How to easily paint a fun light bulb icon pull chain

light bulb icon pull chain


You’ve had it happen before.  You enter a room and want to turn on the ceiling fan light but instead of pulling the right cord for the light you turn the fan on full blast.  Not a fun experience right.  Well if you paint a simple but fun light bulb icon pull chain you will never pull the wrong cord by mistake again! 

It’s so easy to paint this light bulb icon pull chain in just minutes.  Then, attach it to your ceiling fan.  Using a piece of recycled champagne or wine cork you simply paint the light bulb with acrylic paint, so it basically costs nothing!  How is that for solving this common household problem?  So lets get started

Materials:

Ultra fine line sharpie marker
White acrylic paint
Silver acrylic paint
Yellow acrylic paint
Clear acrylic finish
Small paintbrush
Champagne or wine cork
Ball chain
X-acto or craft knife
Small awl or drill
Tacky craft glue
Corrugated cardboard or self-healing plastic mat
Fine sandpaper

1.     Working on the cardboard or self-healing mat use the craft knife to slice about ¾” off the top of a wine cork or champagne cork.  A Champagne cork is larger so that is what I used, but you can substitute a wine cork and your light bulb will be smaller.


2.     Use the sandpaper to file down any writing on the top of the cork and to make a smooth surface and remove any writing.


3.     Next, use the awl or drill to make a hole in the cork.  You only need to drill halfway down.  Then, add a dab of tacky craft glue and push the ball chain into the hole and let dry.  You are ready to add your image.


4.     Using the fine line marker draw a light bulb shape on the flat side of the cork.  (Pear shaped, see photo)  Next fill in the bulb with white paint.  Then, add the silver paint for the top of the bulb. 


5.     Finally outline the entire outside area of the bulb with yellow paint and let dry completely.


light bulb icon pull chain


6.     When the paint has dried, with the marker, draw some highlight lines around the bulb.  Then coat the entire piece with clear finish. Let dry and attach to your ceiling fan light.

light bulb icon pull chain

light bulb icon pull chain

We'd love to hear your comments!  And please follow us on Facebook, Twitter, Pinterest, and visit Make it easy crafts each week for more quick and easy crafts, recipes, and more!

light bulb icon pull chain


Saturday, January 6, 2018

Make it easy craft's five best posts of 2017

Make it easy crafts five best posts of 2017


I figured what better way to start 2018 than to put up a list of Make it easy craft's five best posts of 2017.  This past year recycled wine cork crafts were very popular as were painted rocks.  The best of which are listed in order of popularity.  

It’s a New Year and a new chance to start anew.  While I don’t buy into the resolution thing, I do feel that every year gives everyone a refreshed chance to get it right. Whether you need to work on yourself or on how you relate to others it never hurts to try to be the best you can be.

With that said I must apologize for being a bit lax with posts of late.  The Holidays, this year, were even more busy than they have been in the past and the time seems to fly by.

So instead of a resolution that will just fall by the wayside in a couple weeks, I will focus on one thing for 365 days.  I will focus on one positive word each month.  The word for January is kindness. 

So with no further adieu, I will list the five most popular posts of 2017 and wishing you the best as we dive into 2018. 

1.  Loveable wine cork Valentine bear


Thanks for a great year and hope your New Year will be the best ever!!!