Tuesday, June 30, 2015

Upcycled denim hair bow tutorial

upcycled denim hair bow


Don't throw those jeans away, recycle them into cute denim hair bows! Denim is so hot right now and denim goes with just about anything.  You can dress it up or dress it down.  The skies the limit.

There are so many things you can do with an old pair of jeans that I just love it when they start to get a bit too worn to wear. Visit Bowdabra blog for the full tutorial today and be sure to come back next week for more easy to make projects, crafts and recipes!

Click on the photo for the tutorial:

Upcycled denim hair bows


Monday, June 29, 2015

Easy Kid’s craft | chalkboard clip magnets

Chalkboard clip magnets


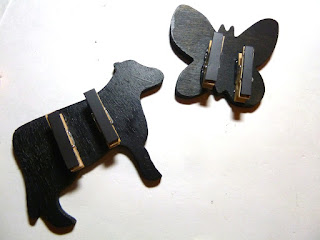
Do you need an idea for an easy kid’s craft?  These quick to make Chalkboard clip magnets are just what you are looking for!  These clip magnets are great for vacation Bible school crafts, Girl Scouts and camp crafts.  You can make them in any wooden shape you like.  The kids will have a blast painting the wooden shapes and then they can display their artwork or notes on the clips on any magnetic surface.  Since the supplies are minimal and inexpensive it’s great for large groups.

Supplies:

Mini clothespins

Wooden shapes

Chalkboard paint (I used black but it comes in all colors)

Magnetic tape

Hot glue gun and hot glue sticks

Small paintbrush

Waxed paper to protect your work surface

Paper plates for palette

Instructions:

1.     Place waxed paper over your work surface to protect it.  Add some chalkboard paint onto a paper plate and using the small paintbrush, apply a coat of paint onto the edges of your shape.  Lay the shape down and apply a coat of paint to the surface.  Let dry.  When the paint has dried apply a second coat over the first coat.  Let dry.

chalkboard clip magnets

chalkboard clip magnets


2.     When the paint has dried turn over and apply a coat of paint to the back.  It is not necessary to apply a second coat on the back.  Let dry.

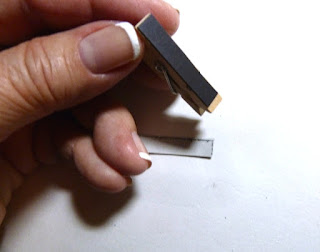
3.     Measure the mini clothespin and cut the magnetic tape to fit down one end.  Remove the backing and adding a bit of hot glue as well, apply to the clothespin.  Repeat for a second clothespin.  (You need two mini clothespins per magnet unless your shape is very small)

chalkboard clip magnets

chalkboard clip magnets

chalkboard clip magnets

4.     Using hot glue attach the Clothespins to the back of the painted shape. 
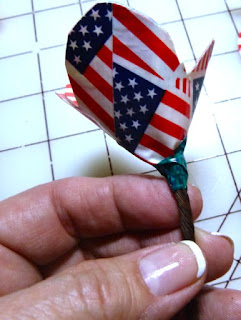
chalkboard clip magnets


5.     Use chalk to write a name or whatever you choose.  It’s fun to make one for each member of the family, and you can attach notes to the clips.


Tuesday, June 23, 2015

Patriotic duct tape long stem rose


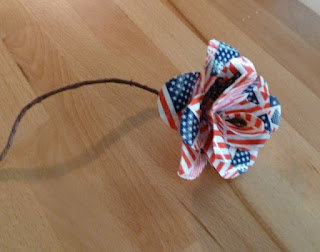
Decorate your 4th of July table with this quick and easy to create patriotic duct tape long stem rose.  Make one or make a bunch. The grapevine wire bends easily and allows you to use them in lots of ways. Lay them on your table, twist them around bannisters or put one in a bud vase for a centerpiece.  The applications are limitless. 

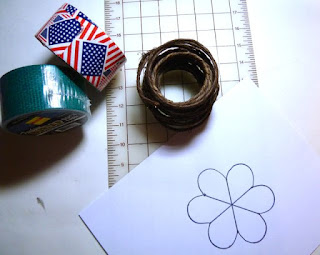
Supplies:

Patriotic duct tape

Green duct tape

Grapevine wire

Self-healing mat to work on

Scissors

Ruler

Wire cutters

Marker

X-Acto or other craft knife

Flower pattern

Printer and paper


Directions:

Patriotic duct tape long stem rose


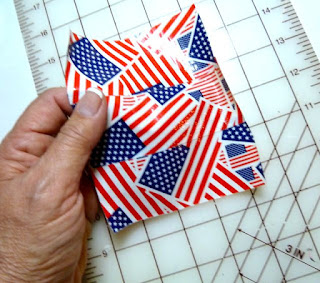
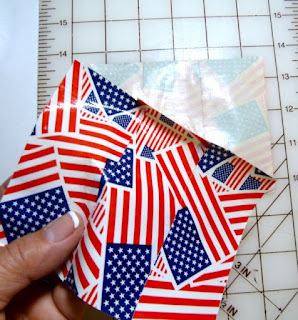
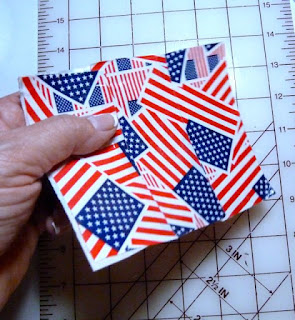
1.     Cut three pieces of duct tape about 3 1/2 inches each more or less. (It just needs to be the width of the flower pattern) Attach them together lengthwise overlapping each to make one whole piece.  Repeat this procedure again and then attach the sticky sides together. (It doesn’t matter if they are uneven) 

Patriotic duct tape long stem rose

Patriotic duct tape long stem rose

Patriotic duct tape long stem rose

Patriotic duct tape long stem rose

2.     Repeat step 1 two more times so that you have three pieces of usable duct tape sheets with the print on both sides.

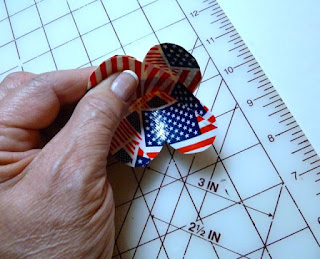
3.     Download, print and cut out the pattern.  Place the pattern on top of one of the duct tape sheets and cut out.  Cut a slit to the center on one of the petals and fold over the petal beside it and secure with a small piece of duct tape ½” x 1” on the inside.  (See photo)  This is the largest petal group.

Patriotic duct tape long stem rose
It's easier to show on the pattern piece where you cut the slit on the duct tape sheet to attach one petal to the other


Patriotic duct tape long stem rose


Patriotic duct tape long stem rose

4.     Use the same pattern piece cut and remove one of the petals. (See photo)  Use the pattern on top of the other duct tape sheet to cut it out.  Fold the end petal over the one beside it and secure with a small piece of duct tape like you did before.  You will have the second largest petal group.

Patriotic duct tape long stem rose

Patriotic duct tape long stem rose

Patriotic duct tape long stem rose

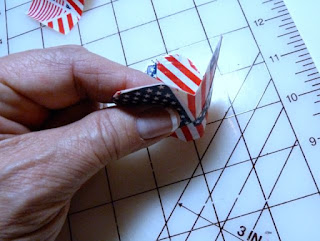
5.     For the last and smallest petal group, use the same pattern piece but cut out another petal so that you have two petals removed.  Place on top of the duct tape sheet and cut out.  Fold the end petals together laying one on top of the other and secure with a small piece of duct tape.  (See photo)

Patriotic duct tape long stem rose

Patriotic duct tape long stem rose

Patriotic duct tape long stem rose

Patriotic duct tape long stem rose

6.     Use one of the petal shapes for a pattern to cut out a piece from duct tape with the sticky side still usable.  Cut a small piece of duct tape to cover the top portion. It will resemble an ice cream cone with the sticky side at the bottom. 

Patriotic duct tape long stem rose

Patriotic duct tape long stem rose

Patriotic duct tape long stem rose

Patriotic duct tape long stem rose


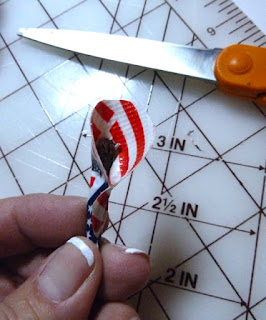
7.     Twist the petal piece around a 12-inch stem cut from the grapevine wire.  (See photo) This is the center of the flower.

Patriotic duct tape long stem rose

8.     Cut a tiny slit in the pointed bottoms of all the petal groups to make a hole. This is where you will insert the wire.


Patriotic duct tape long stem rose

9.     Starting with the smallest petal group insert the wire through the bottom and slide up to the top.  Secure around the stem with a ½” x 1” piece of green duct tape that is cut to a point on each end.  Repeat this step with the second largest petal group and end with the largest petal group.

Patriotic duct tape long stem rose

Patriotic duct tape long stem rose

Patriotic duct tape long stem rose

Patriotic duct tape long stem rose

Patriotic duct tape long stem rose

Patriotic duct tape long stem rose

10. Add some extra green duct tape at the bottom and stem if needed. Use a small paintbrush end or a pencil to curl the petals.  Slit the petals a bit so that you can curl the ends easier.

Patriotic duct tape long stem rose


Patriotic duct tape long stem rose


Monday, June 22, 2015

Recycled napkin rings tutorial


You can make easy elegant napkin rings out of a recycled paper towel roll and the Bowdabra mini Bow maker. These napkin rings are so inexpensive that you will want to make some for all your friends and relatives as well. I found these adorable mesh look flowers at the dollar store and used some scrap ribbon and felt to create a whole set in less than an hour. Crafting is a fun family affair so let the kids help too!

Click the photo below to visit Bowdabra blog for the full tutorial:

Recycled napkin rings


Monday, June 15, 2015

Four leaf clover pendant with dimensional Mod Podge


Have you ever pressed flowers or greenery?  It’s really quite easy and doesn’t require too many supplies.  I happen to have a patch of clover in my front yard and in one area there are usually some of the four-leaf variety. If you don't have any clover,  you can choose a small flower or bud to press. Flower presses are available in most craft stores and are quite inexpensive, or you can make your own. You can even just use a heavy book.  (Make sure it’s a book you wouldn’t mind the pages getting a bit stained in the process) 

To make a flower press you will need to cut two rectangular pieces of wood the same size.  Drill holes in all four corners of both boards matching them up.  Purchase long screws that fit in the holes leaving enough protruding to tighten the boards together with wing nuts.  Cut corrugated cardboard to fit in between the boards and newsprint paper to put between the cardboard.  That’s all there is to it!

Supplies:

Small pressed four leaf clover or flower

Flower press or heavy book

Unprinted newsprint paper

Cardboard

ModPodge bezel pendant

Clear dimensional ModPodge

Tacky craft glue

 1/8” wide ribbon or ball chain in a length of your choice

To use a flower press:

1.    Choose a small flower or clover.  Use the freshest flowers you can find and dry them completely.  When they are pressed they will become thinner and semi-transparent but will retain most of the original color.

2.    Open the press and place a piece of cardboard on the bottom board.  Lay down a piece of equally sized newsprint placing the flower or clover on top.  Lay another piece of newsprint paper on top of the flower and a second piece of cardboard on top of that.

3.    Attach the top board and tighten with the wing nuts.  Lay aside for at least a week depending upon the thickness of the flower. 

To use a heavy book:

1.    Open a heavy book to the center.  Sandwich your flower or clover between two pieces of newsprint paper and close it in the book.

2.    Place some more books or weight on top and set aside for a week or so.

3.    After the flower has dried carefully remove it from the book.

To make the pendant:

1.    Gather your supplies. After your flower or clover has dried carefully remove it from your pressing device.


2.    Add a tiny dab of tacky glue in the center of the pendant.  This is just so that the flower or clover stays stationary while you are working.


3.    Do not shake the ModPodge dimensional glue, as it will cause bubbles to form.  Begin adding the glue so that it fills up the pendant to the edges.  It will go on cloudy but will dry clear.


4.    Set aside and let dry several hours or overnight.


5.    Loop a piece of 1/8” wide ribbon and insert into the top loop of the pendant; pull the other two ends through to knot at the top.  Tie a knot with the other ends to finish.  Or you may optionally use a ball chain.