Wednesday, April 27, 2016

Recycled K-cup graduation cap


Do you have an upcoming graduation party on the horizon?  If so this cute little recycled K-cup graduation caps that fit on a soda bottle will dress up your table in style.  You can make these in any color to match the graduating class colors, or simply make a generic black one.  If the color of your cap is the color of the K-cup you can even skip the painting step like I did or simply spray paint them with a color of your choice.

This is a quick and easy craft and you use something that you normally toss in the trash.  You can even write the date and the name of your graduate on the outside with a sharpie marker so they have a lasting memory of the big day.  These little graduation caps looks so cute on a soda bottle!

Supplies:

K-cup for each graduation cap
Corrugated cardboard
Mat board or heavy card paper
Embroidery floss in desired color
Cabochon or rhinestone, button for the top of the cap
Tape
Ruler
Scissors
Pencil
Hot glue gun and hot glue sticks
Optional:  For personalized colored cap, spray paint in desired color, sharpie marker for coloring the sides of the brim

Instructions:

1.     If you are painting your cap to match your particular school, spray the K-cup and mat board or card paper in your choice of color.  Work in a well -ventilated area.  Let the paint dry completely. My K-cup was black so I used it as is. White graduation caps are also popular and many K-cups are white.


2.     To make the tassel cut a piece of corrugated cardboard 2” x 1 ½”. 


3.     Using embroidery floss cut a 3” piece and lay it across the top of the cardboard piece horizontally.  (You will tie your tassel with this)


4.     Wrap some embroidery floss around the cardboard piece over the tying piece vertically about 12 times.  Tie the top thread into a knot and slide off the cardboard.  Cut the bottom loops to make your tassel.


5.     Cut another thread and tie it about ¼” from the knot to complete your tassel.  Snip the ends evenly.


6.     Use a small piece of tape to hold the tassel down while you braid the top threads. (Hanging cord)  Set aside.


7.     Cut a 2 ½” x 2 ½” piece of mat board or heavy card paper.  I used black mat board and colored the white edges with a sharpie marker. 

8.     Using the hot glue gun attach the top cord to the center of the cap brim.  Glue on a cabochon, rhinestone or button to match. 


9.     Use the hot glue gun to attach the brim to the bottom of the K-cup.  You will need the top to place on a soda bottle.


Thursday, April 21, 2016

Patriotic mini wearable hat - recycled craft

Patriotic mini hat


Memorial Day and July 4th is on its way and you can be prepared with a patriotic mini hat wearable!  You can wear this little patriotic mini hat by with the handy hair clips under the brim at all your parties and events.  And the best part of all is that you make it from an up-cycled Jell-O or pudding cup.  The kids will love to make these little hats.  You can optionally add some elastic string to the brim so the kids can easily wear them.

Supplies:

·      Jell-O or pudding cup, washed and dried
·      Acrylic paint in red and white
·      Heavy cardboard or mat board in blue
·      Star ribbon
·      Red rattail ribbon
·      Scissors or craft knife
·      Corrugated cardboard piece to protect your work surface
·      Paper plate to hold the acrylic paint
·      Small paintbrush
·      Hot glue gun and hot glue sticks
·      Two alligator clips or optional string elastic
·      Compass
·      Blue sharpie marker
·      Optional: string elastic and awl or nail

Instructions:

1.     Paint white strips on the cup with the white acrylic paint and let dry.  After the white paint has dried paint red stripes next in the spaces next to the white stripes.  Let dry.  After it has dried add another coat of both colors if needed.

Patriotic mini hat

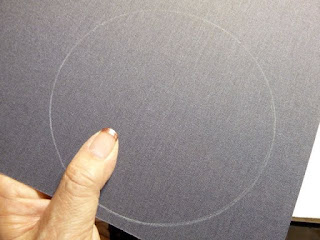
2.     Using the compass draw and cut out two 2 ½” diameter circles from the heavy blue mat board.  In the center of one the 2 ½” diameter circles cut out a 1” diameter circle.  This will fit over the cup to form the brim.

Patriotic mini hat

3.     Use the blue sharpie to color the edges of the circle if they are white.

Patriotic mini hat

4.     Fit the mat board/ cardboard brim over the painted cup and glue to the lip of the cup.  Glue the smaller blue piece of mat board or heavy cardboard to the top of the hat.

Patriotic mini hat

Patriotic mini hat

5.     Measure around the brim area and cut a piece of 1/4” wide star ribbon to fit around.  Use the hot glue gun to attach.  Glue rattail ribbon around the edge where the brim meets the hat to fill in any gaps.

Patriotic mini hat

6.     Glue the second mat board/cardboard large circle to the bottom open part of the hat with some hot glue.


7.     Attach two alligator hair clips to the bottom of the hat. 


Optionally:   make two holes on either side of the brim and thread some string elastic through the holes an knot them.


Wednesday, April 13, 2016

Pop up gift card holder

 Gift card holder tutorial


Wondering what to get Mom this year? The perfect gift sometimes turns out to be a gift card but sometimes they seem a little impersonal. So why not make an adorable pop up gift cardholder you make especially for her and present it in style?

Mother’s Day is right around the corner and what do you get the mom who has everything. Maybe you’ve given your mom one too many potted plants or coffee mugs. And seriously how many “Best Mom” T-shirts can one woman have?

There are so many choices for gift cards. Could she use a spa day? Would she like some new duds at her favorite store? Maybe dinner and movie would fit the bill? You can find a gift card for almost anything these days.

Click on the photo to visit Bowdabra blog for the full tutorial. Make this Mother’s Day pop up gift cardholder in minutes with things you already have on hand. Make a pretty ribbon loop with a Bowdabra bow attached to hold your card closed. Remove the ribbon closure and the gift card pops up!

Monday, April 11, 2016

Milk carton birdhouse


The birds are singing around my house every morning and building their nests.  I’m sure that some birds are looking for a birdhouse home as well.  I made this cute birdhouse out of a milk carton (Although mine contained almond milk) in just a few minutes for practically no cost. 

While you can optionally paint little rectangles for the bricks, I simply cut a rectangle shape in the bottom of a champagne cork and used it as a stamp so the bricks went on in a flash.  Additionally I used a sponge to paint the windows, but you can simply paint them on if you desire.

I can’t wait till a little bird family moves into this little birdhouse home. 

Materials:

Empty milk or juice carton with a screw top
Gesso or white acrylic paint
Acrylic paint – brown, barn red, black
14 ml wire
Ruler
Champagne cork (optional)
X-Acto or craft knife
Pencil
Drill with small drill bit
Dowel to fit with about 2 inches on each side
Compressed sponge (optional)
Paper plates
Twigs that are around the same width
Hot glue gun and hot glue sticks
Small paintbrush
Garden snips

Directions:

1.     Wash out the milk carton and dry completely. 

Milk carton birdhouse

2.     Draw a small circle approximately 3” from the bottom center of the front of your birdhouse.  Use the craft knife to carefully cut out. 


3.     Draw another smaller circle about the diameter of your dowel under the entry hole.  Draw a corresponding hole on the other side of the carton.  Cut both pieces out with the craft knife and insert the dowel all the way across.

Milk carton birdhouse

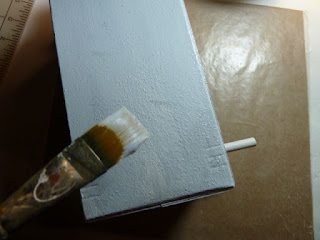
4.     Cover your work surface with some waxed paper and paint the entire carton with gesso or white acrylic paint.  Let dry and apply a second coat if necessary. 

Milk carton birdhouse

5.     Optional step: If you are using a sponge to paint the windows, draw a window on the sponge and cut out.  Wet it so that it fattens up.  Add some brown paint to a paper plate.  Dip the sponge in the brown paint.  Pat on the plate to remove any excess paint. Sponge paint windows on the sides.  Let dry.  If you choose not to use a sponge, paint on the windows. Let dry.


6.     Optional step:  Draw a small rectangle on the bottom of a champagne cork and cut out to make a stamp.  If you choose not to use a stamp, you may optionally paint on the bricks.


7.     Paint the screw top red and let dry.

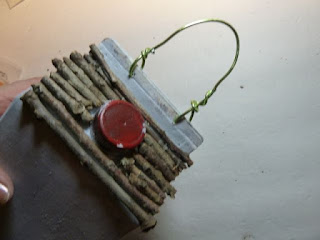
8.     Cut the twigs and begin applying with hot glue to the roof.  Cut the pieces around the screw top smaller to fit.  Attach twigs across the side open edges of the roof to close the dormer area.


9.     Drill two small holes 1” from each side.  Thread the wire through the holes and make hanger twisting to secure.

Milk carton birdhouse

10. Paint or stamp the bricks using brick red paint. In rows across all the side of the birdhouse.  Let dry.
Milk carton birdhouse


11. For a finishing touch outline the windows with some black paint and a small paintbrush.

Milk carton birdhouse


12. Put some straw or fiberfill in the bottom of the birdhouse and hang on a tree branch.


Milk carton birdhouse

Milk carton birdhouse