The birds are singing around my house every morning and
building their nests. I’m sure that some
birds are looking for a birdhouse home as well.
I made this cute birdhouse out of a milk carton (Although mine contained
almond milk) in just a few minutes for practically no cost.
While you can optionally paint little rectangles for the
bricks, I simply cut a rectangle shape in the bottom of a champagne cork and
used it as a stamp so the bricks went on in a flash. Additionally I used a sponge to paint the
windows, but you can simply paint them on if you desire.
I can’t wait till a little bird family moves into this
little birdhouse home.
Materials:
Empty milk or juice carton with a screw top
Gesso or white acrylic paint
Acrylic paint – brown, barn red, black
14 ml wire
Ruler
Champagne cork (optional)
X-Acto or craft knife
Pencil
Drill with small drill bit
Dowel to fit with about 2 inches on each side
Compressed sponge (optional)
Paper plates
Twigs that are around the same width
Hot glue gun and hot glue sticks
Small paintbrush
Garden snips
Directions:
1.
Wash out the milk carton and dry
completely.
2.
Draw a small circle approximately 3” from the
bottom center of the front of your birdhouse.
Use the craft knife to carefully cut out.
3.
Draw another smaller circle about the diameter
of your dowel under the entry hole. Draw
a corresponding hole on the other side of the carton. Cut both pieces out with the craft knife and
insert the dowel all the way across.
4.
Cover your work surface with some waxed paper
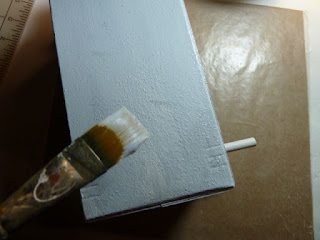
and paint the entire carton with gesso or white acrylic paint. Let dry and apply a second coat if necessary.
5.
Optional step: If you are using a sponge to
paint the windows, draw a window on the sponge and cut out. Wet it so that it fattens up. Add some brown paint to a paper plate. Dip the sponge in the brown paint. Pat on the plate to remove any excess paint. Sponge
paint windows on the sides. Let
dry. If you choose not to use a sponge,
paint on the windows. Let dry.
6.
Optional step:
Draw a small rectangle on the bottom of a champagne cork and cut out to
make a stamp. If you choose not to use a
stamp, you may optionally paint on the bricks.
7.
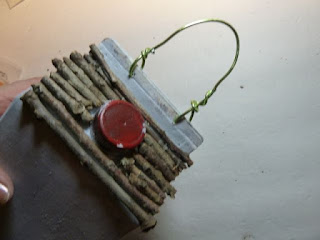
Paint the screw top red and let dry.
8.
Cut the twigs and begin applying with hot glue
to the roof. Cut the pieces around the
screw top smaller to fit. Attach twigs across the side open edges of the roof to close the dormer area.
9.
Drill two small holes 1” from each side. Thread the wire through the holes and make
hanger twisting to secure.
10. Paint
or stamp the bricks using brick red paint. In rows across all the side of the
birdhouse. Let dry.
11. For
a finishing touch outline the windows with some black paint and a small
paintbrush.


This is brilliant! Crystal, let us know if the birds use it. I want to know!
ReplyDeletegreat thing, love this DIY :-)
ReplyDeleteThanks for your comment, so glad you like it!
Delete