Showing posts with label Valentine's Day. Show all posts

Wednesday, January 11, 2023

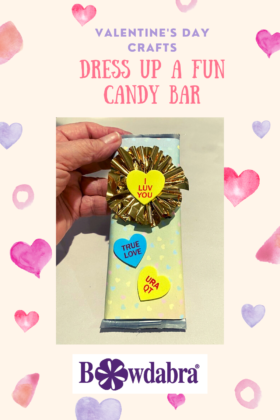
How to dress up a fun candy bar for Valentine's Day

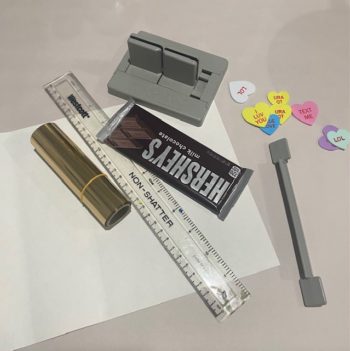
Looking for a way to present a treat for Valentine’s Day, that is easy and allows you to make a bunch of them in minutes?  Well, dress up this fun candy bar for Valentine’s Day.  It’s a great idea for a party favor or a classroom.  Easy step-by-step tutorial. I've used the Bowdabra to create the bow for this craft. You can optionally substitute a premade bow if desired.

Materials:

  • Flat candy bars, square or rectangular
  • Heart scrapbook paper
  • Tacky glue
  • Scrunchy ribbon
  • Mini Bowdabra
  • Bowdabra bow wire
  • Heart-shaped foam stickers
  • Ruler, pencil, scissors

Instructions:

fun candy bar

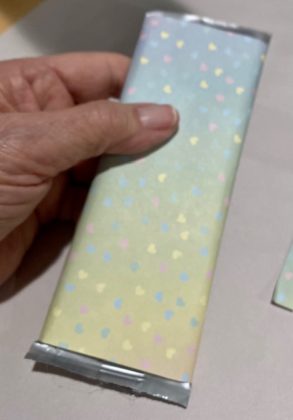
First, measure your candy bar and cut the scrapbook paper to fit around with the ends open. Glue on the bottom first, then wrap around the two sides and glue.  Your candy bar is wrapped. Set aside.

fun candy bar

First, measure your candy bar and cut the scrapbook paper to fit around with the ends open. Glue on the bottom first, then wrap around the two sides and glue.  Your candy bar is wrapped. Set aside.

fun candy bar

Next, cut a piece of Bowdabra bow wire.  Then, fold it in half and insert it into the Bowdabra.  You will have a loop on one side and two loose wires on the other side.  This will serve as your slipknot. Tuck the ends under to stay out of the way.
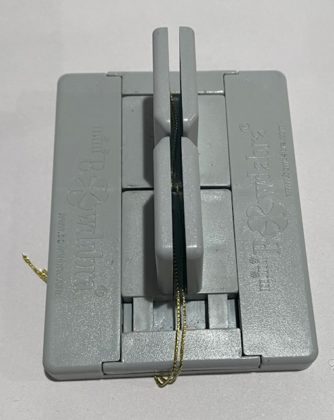
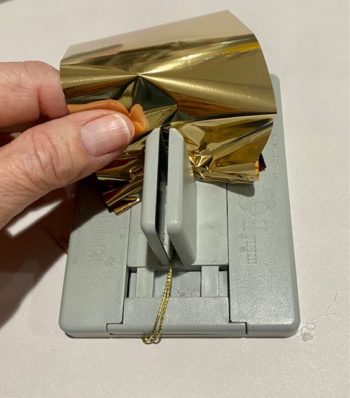
Cut about 12” of scrunchy ribbon and cut in half lengthwise.  Begin feeding the scrunchy ribbon from the top down, like an accordion. Scrunch down with the Bowdabra wand.
fun candy bar

Thread the two loose wires through the loop and pull tight while the bow is still in the Bowdabra.  Remove and separate the ends, turn to the back and tie a knot. Clip the excess wire.
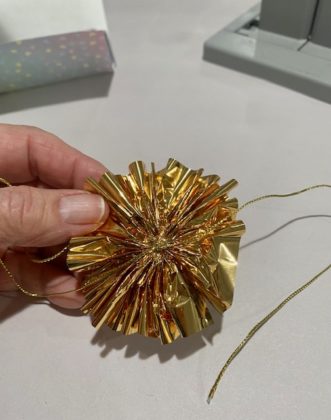
fun candy bar

Now, glue the scrunchy bow on the front of your wrapped candy bar.  Attach a foam conversation heart to the center and a couple of smaller ones on the front.
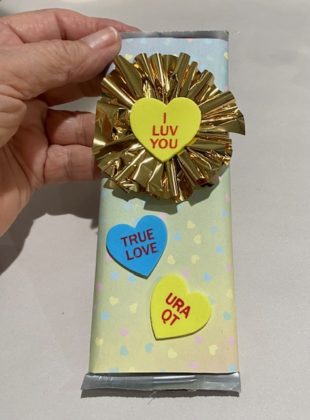
fun candy bar

Now, go ahead and make a bunch because one fun candy bar is never enough!
fun candy bar


Tuesday, January 23, 2018

How to make a quick and easy Valentine's Day magnetic bookmark

Valentine's Day magnetic heart bookmark


This quick to make Valentine's Day magnetic bookmark is so easy that you may want to make a bunch and give them out in a Valentine card to your friends and loved ones.  You can easily sign them before you add the contact paper.  You could even give your sweetie a book of love poems and add the Valentine's Day magnetic bookmark with it.  Change the colors and scrapbook paper print to personalize!  

Materials:

Magnetic sheet, one side adhesive

Scrapbook paper in desired print

Tacky craft glue

Small amount of clear contact paper

Glitter fabric paint, red

Pencil, ruler, scissors

1.     Make a pattern of two small hearts, one a bit larger than the other. (To make a heart pattern fold a piece of paper in half and draw a half heart on the fold. Cut out. Open and you will have a symmetrical heart.)  Play around with different sizes and shapes of hearts.


2.     Using the heart pattern, cut out a large one and a small one from the magnetic sheet.  Cut out a small and large heart from the scrapbook paper as well.


3.     Remove the adhesive backing from the large magnetic sheet heart, line up the corresponding large scrapbook paper heart and attach.  Trim around any overlapping edges. Repeat with the smaller magnetic and scrapbook paper hearts.


4.     Cut a strip of scrapbook paper 6 inches by 2 inches.  Fold 2 inches down from one end. On the unprinted side of the scrapbook paper you can write your Valentine a message if you desire.


5.     Cut two pieces of clear contact paper 6 ½” x 2 ½.” Lay one piece of contact paper adhesive side up and remove the backing.  Place the scrapbook strip print side down on top and adhere.  Remove the backing from the other piece of contact paper and place over the strip already attached to the contact paper.  (Like a contact - paper sandwich)  Trim any edges that do not meet.  Refold where you folded it 2 inches down from the top.

Add your message here


6.     Spread some tacky glue on the larger of the two hearts and adhere to the front of the bookmark (short edge)


7.     Spread some tacky glue on the smaller heart and attach to the area of the back where it meets the front heart, thus magnetizing the two together. (This will keep it on the page)  Let dry completely.  When dry you may decorate the front with small dots of glitter fabric paint if desired.


Enjoy and hope you and yours have a Happy Valentine's Day!

Wednesday, February 1, 2017

How to make a lovable wine cork Valentine bear

Valentine wine cork bear


This little recycled wine cork Valentine bear is cute as a button just sitting down or you can add a wire hanger and attach him to a bag of special candies.  Make him out of corks from a special celebration or wedding and you can mark the date on the bottom with a sharpie marker.

Write with the sharpie on the bottom the date of this special wine cork Valentine bear for a lasting keepsake.  

Wine cork Valentine bear 


You will need:

3 wine corks

1 champagne cork

1/8” thick cork sheet available at craft stores

Small awl or pointed nail

Xacto or craft knife

Scrap of white and red felt

Tiny brown pom pom

Black dimensional fabric paint or small black beads

20-gauge wire

Wire cutters

Ruler

Fine line marker

220 fine sandpaper

Piece of heavy corrugated cardboard to cut on

Glue gun and glue sticks

(Optional hanger)  Scrap of 22-gauge red wire


1.     Protect your work surface with one or two pieces of heavy corrugated cardboard. Using two matching wine corks and the Xacto knife, slice thinly down each cork.  Rub on the fine sandpaper to smooth.  This will allow the corks to be stable. Run a bead of hot glue down the side of one cork and attach them together.  These are the legs and base of your bear. 


2.     Add a generous amount of hot glue on the bottom of the champagne cork (Body) focusing on the areas where it attaches to the legs. Center the body on the legs and attach. (See photo)


3.     Measure and mark a line halfway across the third wine cork.  Use the Xacto knife to cut the cork in half.  Rub the cut end of one half on the sandpaper to smooth.  Turn the half cork on its end and mark in half diagonally and cut.  You will have two arm pieces.  (Save the other half for another bear or discard)


4.     Cut a ½” piece of 20-gauge wire.  Use the awl to make a pilot hole in an arm piece and insert the wire piece.  Make another hole in the body with the awl or nail, add some glue on the arm end with wire and insert into the body hole.  Repeat for other arm on opposite side.


5.     Trace and cut two ears (half moon shapes) on the flat 1/8” thick cork and use the Xacto to cut out.  Cork cuts easily but at that thickness it is simpler to cut them out using short strokes with the pointed end of the Xacto.  If there are any rough areas lightly rub against the sandpaper.  Trim to fit the head if necessary. Add some glue to the edges of the ears and attach to each side of the head. 


6.     If you choose to add a hanger, cut a 2 -inch piece of 22 gauge wire with wire cutters and fold in half to form a loop.  Make a hole in the center top of head with the awl or nail.  Add some glue to the ends of the wire and insert.


Finishing your Valentine wine cork bear

  
7.     Cut the muzzle into circle shape on a scrap of white felt. Glue to the front of the bear face. (See photo)  Glue a tiny brown pom pom to the muzzle for a nose. Add some dots of dimensional black fabric paint for the eyes and let dry.  (You can substitute black seed beads if you choose)


8.     Cut a large heart shape for the stomach from a scrap of red felt. Then add the heart to the stomach area with some hot glue. Next, cut two small heart shapes from the red felt and glue them onto the feet as pictured. 

Wine cork Valentine bear

Note: You can make a pattern for your heart shapes by folding a piece of paper in half.  Draw a curved half heart shape on the fold and cut out.  Open and trim to the size you need if necessary.

Wine cork Valentine bear


Thursday, February 11, 2016

Dollar Bill Valentine Heart

Dollar bill Valentine heart


They say a dollar doesn't buy much anymore.  I find that dollars can purchase more smiles than you can imagine. Have you ever folding a dollar bill into something non-monetary? In this world where people are more self centered I enjoy just surprising someone with a folded dollar bill.

It may be the hard-working hostess or waitress in a restaurant.  Sometimes it's a child who is not very happy at the moment.  Sometime's it's the perfect thing to stick in a Valentine's Day card. The thing is, it's a surprise when someone gives you something without any expectation of something in return except a smile.

 I love to seeing the happy looks on someone's face when I give them a dollar that has been transformed into something else.  The only problem is they never want to unfold it and spend it.  Then again, maybe that is not a real problem.

With Valentine's Day approaching I thought these little dollar bill hearts will brighten someone's day. And it's so easy, just follow the simple directions and you too can share happy hearts in abundance.

You will need:

A crispy dollar bill (One that is fairly new)
A few minutes of your time (Origami is very relaxing, but addictive as well)
A straight pin or opened paper clip (Something to help open the tiny folds)

Directions:

1. Begin with the dollar with Washington facing up.  Fold one corner of the bill to the center and crease.  Do the same with the other side.  Your fold lines will form an X.  Repeat on the opposite end of the bill.


2.  Open the bill and turn over and fold down right at the center of the X to make a crease.  Now use your finger to push in the sides, and you will have a point.  Working on the opposite end of the bill do the same.  (See photo)


3.  Now working on one pointed end, fold up just the top layer.  Fold he other pointed end up as well meeting the two.


4.  Now using a straight pin or opened paper clip open this point and with your finger press down.  Wow, you have as square!  Do the same with the other point as well.  You will have two squares next to each other.


5. Now is the tricky part but it's not really hard...just follow the photos.  Fold up each side of the square into a little kite shape.  Next use the pin to open the folded piece and press down.  You have a little decorative point at the tip.  Repeat for the other folded piece.  Do the same with the other square.


6.  Repeat steps 3-5 with the opposite pointed end of the bill.


7.  Fold the bill so that both decorative edges meet and press down.  Wow, now you have the beginnings of your heart and a tab at the top and a tab at the bottom.  Fold the bill down (It makes no difference which side you fold) so that the two tabs meet.


8.  Tuck in one of the tabs and then tuck in the other tab tightly.  Press down to secure the fold.  Turn over and fold in each side evenly to better form your heart.


See how easy that was?  Now, ready, set, fold!