You can easily make an attractive apple cider vinegar bottle for
yourself or as a hostess gift.
Decoupage has been around for a long time and if you haven’t tried
it, you are missing some great crafting fun.
Bottles of all shapes and sizes are showing up in the craft stores now
and they make great surfaces for decoupage.
The bottle I picked up recently is on its way to being a beautiful and
unique apple cider vinegar bottle. Add a
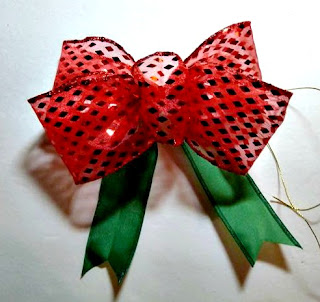
beautiful Bowdabra bow and present it to your hostess at your next get
together! Bowdabra bow makers are available at all major craft retailers and online.
To get the apple photos for your decoupage project simply go online
and search for public domain pictures.
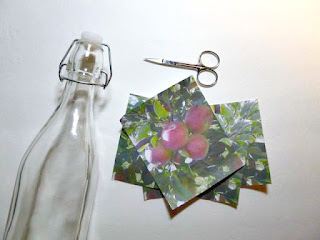
Find some apple photos you like and print on all-purpose paper.
Materials:
Mod podge decoupage glue
Small paintbrush
Photos
Scissors
Bottle with stopper
Mini Bowdabra bow maker with ruler attachment
12 inches green 1 ½” wide wired ribbon
36 inches red 2 ½” wide wired ribbon
18” Bowdabra bow wire
Printer and all-purpose computer paper
Alcohol
Instructions:
1.
First wash and then wipe the outside of your
bottle with alcohol to remove any dirt and oils.
2.
Next, search public domain pictures on the
Internet to find an apple photo you like.
Print the photo in a workable size.
I printed mine at 4 x 6.
3.
After you print your photo, cut around the
leaves and apples with small scissors in a pleasing configuration.
4.
Now apply some decoupage glue with a small
paintbrush on the front of your bottle.
Immediately place the image on the glue.
Then brush on some more glue on top of the image and over the edges. (The glue dries clear)
5.
Add another coat of glue to the top and on any
areas that are not laying flat. Use the
brush to press the image on the bottle.
Let the glue dry completely.
Now make the Bow
6.
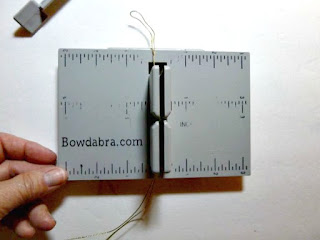
First cut a piece of Bowdabra bow wire 18”. Fold in half and insert into the
Bowdabra. You will have a loop on one
side and two loose wires on the other.
Fold the wires under the Bowdabra to keep out of the way while you are
working.
7.
Now take the green ribbon, and find the center
and insert into the Bowdabra.
8.
Next place the end of the red ribbon into the Bowdabra
and make a loop to the 3-inch mark on the ruler. Twist the ribbon as you insert
it into the Bowdabra to make sure the right side is facing up and make a
matching loop on the other side.
9.
Twist and make another loop. On the last loop bring the end under and
insert into the Bowdabra. Continue and
make the last loop. You will have a
little loop facing to the right, which will be your round center of the bow.
10. Scrunch down with the Bowdabra wand. Insert
the two loose wires through the loop and pull tight while the bow is still in
the Bowdabra. Remove from the Bowdabra,
turn to the back, separate the wires and tie a knot.
11. Lastly,
fluff the bow and poof out the center.


I really love this idea! Thanks Crystal! Hugs!
ReplyDelete